Welcome to the very last challenge for
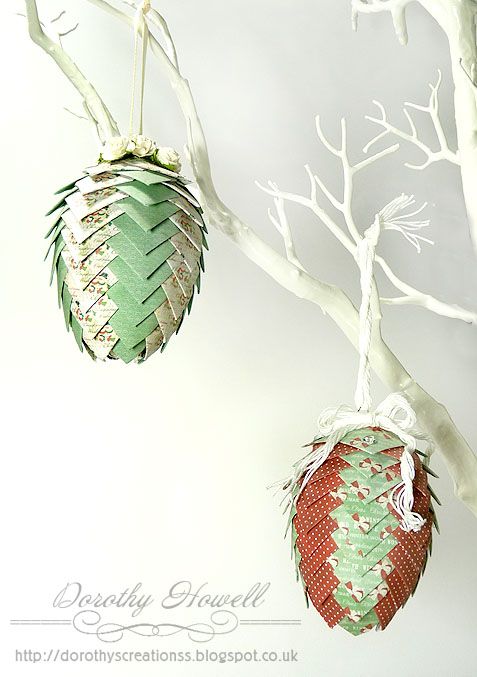
Bearly Mine Challenges. As I mentioned in yesterday's post, Bearly Mine is closing their door because of new EU ruling starting 1st January. Our challenge for December is Christmas Decoration or Ornament (no cards.) So let's see some gorgeous Christmas project entered in our challenge this month! Here is what I made, pinecone ornaments:
I saw this
video by Mari Hop and thought I would give it a go using Bearly Mine digital papers from the
Christmas Traditions 2 pack. Here's what I did:
Supplies to make ONE pinecone:
Styrofoam Egg (I used 80 mm eggs but next time I will use smaller ones)
2 x A4 or Letter sized sheets of designer paper, 2 different designs that coordinate.
Paper trimmer
Tacky Glue
Stuff to decorate the top of you egg
Ribbon to hang egg
Long Eye pin and large jump ring for hanging.
Directions for this larger size pinecone:
-Take your designer paper of choice and I cut them into 1 1/4" inch pieces. Keep the pile of each design separate. (In fact for my large size eggs next time I'll be making the squares 1 1/2" or most likely 1 3/4")
-One one of the square pieces, take two of the corners and fold them in halfway to about a 45 degree angle so there is a point on one side and the regular square on the other. Do this to all of the little squares.
-Start at the narrow end of the styrofoam egg, use 4 of the folded in squares in one pattern and line up the points to cover the bottom of the egg, glue them on with tacky glue, if it's a good one you shoudn't have to hold them in place too long.
-Then using the other pattern, glue 4 more on the square end on the paper piece only and glue it on making sure the pointed bit goes INBETWEEN the first row.
-Continue doing this all the way up the egg to the top.Using my sizes it will take between 36 to 40 pieces in each of the two paper designs.
How to hang:
-Before I added my flowers and bows to the top of my pinecone, I took a long eye pin for making jewellry, added a large jump ring to the eye and pushed it into the top through the paper and styrofoam. It went in quite easily. I took it out again, added tacky glue to the length of the eye pin and pushed it back into the pinecone for added strength.
-I added ribbon through the jump ring and knotted. Then I went about adding flowers and string bows to the top of my pinecones. You could add leaves, flowers, artificial pine boughs, gems, pearls, foam, die cuts, etc.
Of course if you cannot understand my directions, the Mari Hop video will help you out alot so check it out. These ornaments are easy to make and also are very light. They won't fall off the tree because they are too heavy...lol. The pinecones are also fab children's projects great for school, boy scouts, church groups, etc. You could cut up all the little squares in advance out of anything, even newspaper, craft paper or printer paper. My next one if going to be out of old book pages with lots of cream lace!
Hope you enjoyed...and also hope you join us for this month's challenge at
Bearly Mine Challenges!
Happy Christmas Crafting!
Dorothy