Showing posts with label Hybrid Crafting. Show all posts

19 March 2015

DSC #132 - Anything but a Card or Layout

It's Friday! time for a new challenge at Digitally Sweet Challenges! Our lovely sponsor is Bugaboo Stamps and you could win some free digis. Just follow our theme of Anything but a Card or Layout and using some digitally images and you're good to go! This challenge runs to the end of the month so you have plenty of time to enter.

Here is an inspirational image created by me as part of the design team...I made a menu:


I know it's hard to read but it's basically what I ate yesterday...lol. As I might have mentioned, I follow a plant based diet also known as Vegan. So everything on my menu is yummy and oh so good not only for you but great for the animals too! I took the cute Bugaboo Stamps image called Frame It - Stella - todays menu, and coloured it with my Copic Ciao markers in red, oranges and yellows. I matted it an the menu I created on orange, white and red cardstock. I didn't add any doo dads to it because it didn't really need nay. The colours made it look great on its own...lol. Here is the menu if you can't read it:

BREAKFAST:
1/2 a Pink Grapefruit
Bowl of Oatmeal swirled with Vegan Raspberry Jam (no gelatin)
small glass of unsweetened almond milk

LUNCH:
Mixed Baby Leaf Salad with dairy free pesto dressing 
Smooth and creamy (no dairy) Gazpacho soup (raw - made in my blender)
Berry Blast Iced Tea

SNACK:
2 large Rice Cakes with Caramelised Onion Hummus
Sliced Cherry tomatoes and chopped Cilantro on top

DINNER:
Curried Lentil and Butternut Squash Stew (made myself)
Served on a bed or Coriander Rice
Side of Purple Broccoli Stems (steamed)
Water with Lime Wedge

27 February 2015

The Hybrid Chick - Mini Album

Hi all. I would love it if you would go check out my very first hybrid craft project that I posted over on The Hybrid Chick blog.

http://www.thehybridchick.com/2015/02/sweet-anemone-mini-album/

I created this mini album using a beautiful digital scrapbooking kit called "Sweet Anemone" by Paper Garden Projects. I have a step by step posted there. I sure hope you will have a peek!

Happy (Hybrid) Crafting!
Hugs, Dorothy

DSC #129 - Anything Goes!

Ooooh yes..I love an anything Goes challenge and that's what we have for you this week over at Digitally Sweet Challenges! Our sponsor is Lunagirl and she provided us on the Designs Team with some gorgeous images to work with. I created a card. It's basic but my new printer really made the images look fab:


I started with a pale pink pearlised card base. I also had some matching pink pearlised paper to mat the girl image on. I mounted the flower frame background image on brown cardstock and edged with Vintage Photo Distress Ink. I went to town with fine glitter and added it all over the backing image. I also highlighted the pink flowers in the girl image with the glitter. Then as embellishments I added 3 pink buttons a pink stick pin pearl, a swatch of lace and added lace along the opening side of the card. There are also some glitter pen pearls as well. It came together quick but looks quite nice.

We hope you'll join us over at Digitally Sweet and enter a challenge this month...this on is the last for February so look for our Feb winners!

06 February 2015

DSC #126 Colour Challenge

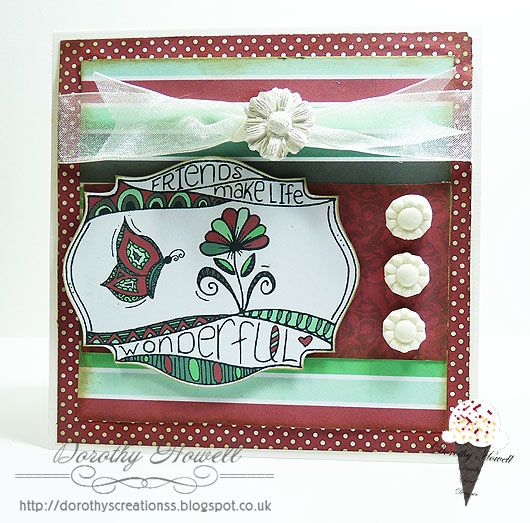
Happy Friday!!! It's time for a new weekly challenge at Digitally Sweet Challenges where hybrid crafting reigns! LOL This week our theme is a colour challenge. Go over to Digitally Sweet to see the colours. Our lovely sponsor is Sparkle n Sprinkle and here is a card I made for my DT project:


I ttok the Friends image into Photoshop and colourised it using the colour for the challenge. I then made three background papers using the same colours: the fine dotted paper, a multi stripe paper and a deep red slightly damask pattern paper. I printed then cut everything out. I arranged the matted layer after distressing the edges with Old Paper Distress Ink. I added a sheer ribbon and knot and moulded flowers that I made with air dry clay and moulds. So easy.

SUPPLIES USED

Zendoodle Friends digital stamp set - Sparkle n Sprinkle
Papers created by me in Photoshop
Ribbon and cly flowers from stash.
White card base from stash

I do hope you qill join us over at Digitally Sweet Challenges this week!

Happy Crafting!
Hugs, Dorothy

04 February 2015

#282 - Owls, Hearts, Love

YEAH...it's time for a new challegne at Crafty Creations Challenges! Our theme is "Owls, Hearts, Love" and we ask that you use owls and/or hearts in your creations for this challenge. Our terrific sponsor is:

https://www.etsy.com/shop/CrochetFlowerShop

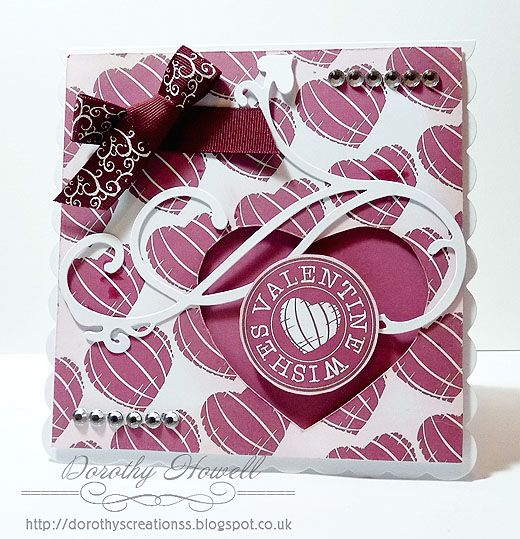
You could win something cool from them too all you have to do is join in the challenge! Here is my Design Team project. I went with hearts and I used one of CFS Designs digis on it:


I used a CFS Designs sentiment with the heart in the middle and took it onto Photoshop. I took the heart. created my own matching backing paper and colourised the sentiment. I also made a small panel of the burgundy colour as well. I printed them on thin cardstock and cut them out then added some Distress Ink in Spun Sugar around the edges and around the cut out heart. I added the solid colour panel underneath then I raised up the heart paper using 3d foam pads on a scalloped card base. I added the sentiment in the centre of the heart by doubling up the foam pads. Finally I added bling gems, a die cut swirl and a dark swirl printed ribbon.

SUPPLIES USED:
Valentine Wishes sentiment - CFS Designs
Distress Ink in Spun Sugar
Backing paper created using sentiment heart in Photoshop by me
Scalloped car base, gems, ribbon and swirl from my stash.

CHALLENGES ENTERED:
Glitter n Sparkle Challenges - Anything Goes
Dream Valley Challenges - Valentine's Day
Scribble and Scrap Challenge - Anything Goes
That Craft Place Challenge - Anything Goes
Crafting From the Heart Challenges - Anything Goes
Through the Purple Haze Challenges - Anything Goes
Whoopsi Daisy Challenges - Pretty in Pink
Crafty Boots Challenges - Hearts and Valentines
Crafty Sentiments Challenge - Include a Heart
Papertake Weekly Challenges - Anything Goes
Digi Choosday Challenges - In the Pink
Creative Inspirations Challenges - Love is in the air
C.R.A.F.T. Chalenges - Valentine's Day
TIME OUT Challenges - Valentines with twist hearts
Creative Fingers Challenges - Anything Goes
Wags n Whiskers Challenges - Hearts
Eclectic Eliapu - Burgundy/Red, Ivory/Cream and Hearts
Paper Creator's Challenges - Love is in the Air
Buckwells Crafty Challenge - Love/Red
Craftyhazelnut's Patterned Paper Challenge - Anything Goes
Natalie and Amy's Challenges - All About the Love


Hope you will join us at Crafty Creations Challenges! thanks for having a peek and my card and as always...

HAPPY CRAFTING!
Hugs, Dorothy

02 February 2015

Big News is Here!

I AM A...

http://www.thehybridchick.com 


Just over a week ago I posted here that I had some big new coming...well this is it! You all know how I love using digital images in my crafting, welllll the digital scrapbook shop, The Digichick, has a sister site that specialised in just this, hybrid crafting, called The HybridChick! I have been receiving their newsletters for literally YEARS and I've wanted to be a part. They currently have a call to join the Hybrid Chick creative team, I applied and they picked me!!!!!!

I am soooo honoured to be a part because the current team is so amazingly awesome. I just hope I can make them proud. I'm picking out a digi kit to work with and figuring out a project to make. Oooooo I'm excited! I hope you all will also love looking at my projects I create for them.

If you love using digital goodies to craft with, then you can join as well! We are still looking for a few more crafters and would love to see your work! Below is the call info and how to apply.

 
Even if you don't want to join the team, why not just check out the site for some terrific crafty ideas? I'm just settling in over there and I hope to have a project ready for February, probably not Valentine-y but still fun...I hope! LOL

Thanks for reading and Happy Crafting!

Hugs,
Dorothy

23 January 2015

DSC #124 Anything but a Card or Layout

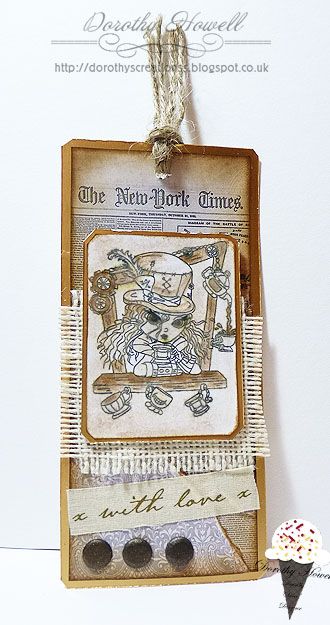
Happy Friday ya'll! Hope you had a good week and are ready for a new challenge over at Digitally Sweet Challenges. Our terrific sponsor this week is Lacy Sunshine and you could win some awesome images from her. All ya gotta do is enter a project using digital and it can be anything but a card or layout. I made a bookmark:

I don't have lots of embellishments on it as I wanted it to lay flat in a book. Yes I still read REAL books too...lol. I first coloured in the Lacy Sunshine image using Vintage Photo Distress Ink with a waterbrush. I also printed out some other papers from Far Far Hill. It's all matted on this matt gold mirri boaRD I found in my stash.  I added jute twine on the top and some frayed burlap under the image. I finished off with some dark brown card candies and some fabric tape that says "with love."

SUPPLIES USED:
Maddie Haddie Steampink Secret Window digi stamp - Lacy Sunshine Stamps
New York Times and Damask digital papers - Far Far Hill
Jute twine and Burlap - Poundland (UK)
Distress Ink - Vintage Photo

Gold mirri board, card candy, fabric tape - from my stash


01 December 2014

December Challenge at Bearly Mine

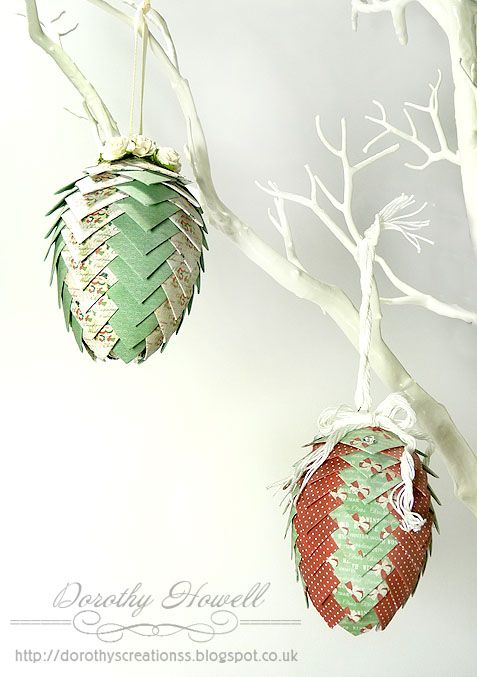
Welcome to the very last challenge for Bearly Mine Challenges. As I mentioned in yesterday's post, Bearly Mine is closing their door because of new EU ruling starting 1st January. Our challenge for December is Christmas Decoration or Ornament (no cards.) So let's see some gorgeous Christmas project entered in our challenge this month! Here is what I made, pinecone ornaments:

I saw this video by Mari Hop and thought I would give it a go using Bearly Mine digital papers from the Christmas Traditions 2 pack. Here's what I did:

Supplies to make ONE pinecone:

Styrofoam Egg (I used 80 mm eggs but next time I will use smaller ones)
2 x A4 or Letter sized sheets of designer paper, 2 different designs that coordinate.
Paper trimmer
Tacky Glue
Stuff to decorate the top of you egg
Ribbon to hang egg
Long Eye pin and large jump ring for hanging.

Directions for this larger size pinecone:

-Take your designer paper of choice and I cut them into 1 1/4" inch pieces. Keep the pile of each design separate. (In fact for my large size eggs next time I'll be making the squares 1 1/2" or most likely 1 3/4")
-One one of the square pieces, take two of the corners and fold them in halfway to about a 45 degree angle so there is a point on one side and the regular square on the other. Do this to all of the little squares.
-Start at the narrow end of the styrofoam egg, use 4 of the folded in squares in one pattern and line up the points to cover the bottom of the egg, glue them on with tacky glue, if it's a good one you shoudn't have to hold them in place too long.
-Then using the other pattern, glue 4 more on the square end on the paper piece only and glue it on making sure the pointed bit goes INBETWEEN the first row.
-Continue doing this all the way up the egg to the top.Using my sizes it will take between 36 to 40 pieces in each of the two paper designs.

How to hang:

-Before I added my flowers and bows to the top of my pinecone, I took a long eye pin for making jewellry, added a large jump ring to the eye and pushed it into the top through the paper and styrofoam. It went in quite easily. I took it out again, added tacky glue to the length of the eye pin and pushed it back into the pinecone for added strength.
-I added ribbon through the jump ring and knotted. Then I went about adding flowers and string bows to the top of my pinecones. You could add leaves, flowers, artificial pine boughs, gems, pearls, foam, die cuts, etc.

Of course if you cannot understand my directions, the Mari Hop video will help you out alot so check it out. These ornaments are easy to make and also are very light. They won't fall off the tree because they are too heavy...lol. The pinecones are also fab children's projects great for school, boy scouts, church groups, etc. You could cut up all the little squares in advance out of anything, even newspaper, craft paper or printer paper. My next one if going to be out of old book pages with lots of cream lace!

Hope you enjoyed...and also hope you join us for this month's challenge at Bearly Mine Challenges!

Happy Christmas Crafting!
Dorothy

24 November 2014

Bearly Mine Inspirational Post

I know I know...I'm a day late with my Inspirational Post for Bearly Mine Designs Challenges. I had it all set up to go for TODAY only I'm a day late...UGH. Ah well I'm all posted now right? LOL.

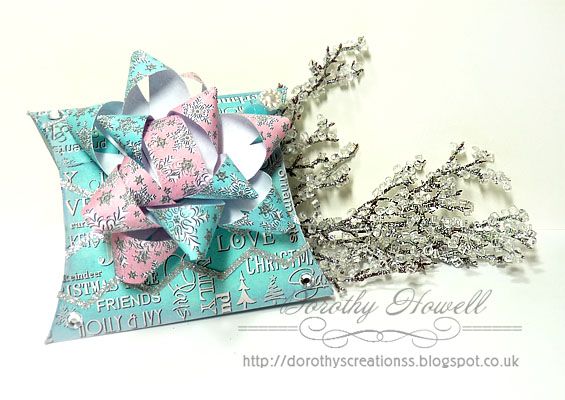
I created this pillow box with handmade bow for a cute christmas wrapping out of the lovely digital creations of Bearly Mine Designs.

I used the Christmas Ice paper kit which you can purchase HERE.


This box turned out so cute! I started off with a pillow box template that I downloaded from the Box Template Store.com. I printed it and cut it out from thin cardstock as a template. Then I printed out one of the word Bearly Mine designer papers in ice blue on the same thin card. On A4 sized 100 gsm paper, I printed out a sheet of half pink snowflake and half blue snowflake papers from BM as well. I traced the template on the back of the worded paper, cut it out and folded it all together. I did NOT cut the slot for the tab at first but waited until I folded the box up as I wanted to make sure it lined up properly which was a good thing because the slot and tab to close the box DID NOT line up properly so I marked it lightly with a pencil and cut the slot then sharpened the creases of my folds so the box was sturdy. I also distressed all the edges in Spun Sugar Distress Ink. On the outside of the box, I added silver glitter chevrons and silver gems for a bit of bling.

For the bow, I cut 3/4" strips of the A4 snowflake papers then I looped them and attached them onto a small brad alternating layers. I liked the look of mixing the pink and blue. I distressed these with Spun Sugar as well.In the upper right corner behind the bow you can sort of see the stick pin I made to stick on there.

SUPPLIES USED:
Christmas Ice paper kit - Bearly Mine Designs
Pillow box template - Box Template Store
Silver Glitter Chevron sticker - Paper Cellar (from my stash)
Silver Gems from stash
Distress Ink in Spun Sugar
Long pin and beads from stash

14 November 2014

DSC #114 Photo Inspiration

It's time for another weekly challenge at Digitally Sweet Challenges! We have started a new format where there is still a new challenge each week but you have until the end of the month to get your project entered. You can read all about it here: New Rules. There is also a post about it HERE with info on our DT Call too!

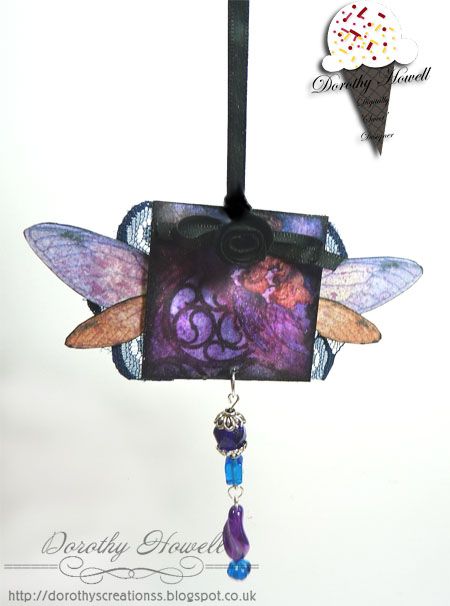
This week our sponsor is the lovely Lunagirl. I just love using Lunagirl images as I'm getting more into vintage style. Wanna win some vintage images? Then ya gotta enter the challenge for your chance! Lunagirl gave us Design Team members some images to work with and here is what I created, a hanging ornament:


Please forgive the bad photo. I took it at night and the light really stunk. This is a twinchie, a 2 inch by 2 inch piece of chipboard that I glued the digital image onto with matt gel medium. I edged the image and sides and back of the twinchie with Black Soot Distress Ink. On the back I added the printed out wings from Lunagirl and some royal blue lace which looks dark in the photo. I spritzed the wings and image with Grape Juice Inkadink spray from Imagination Crafts and I also spritzed with Mr Huey's Shine spray. I'm starting to get into beading, It's slow going but I decided to make a bead dangle. I finally added black ribbon to hang the ornament as well as a black bow and black fabric flower I made. I like how it turned out...now...where to hang it? LOL

SUPPLIES USED:
Main image and wings collage sheet - Lunagirl
Beads - Jesse James Beads Dress It Up Black Magic set
Grape Juice Inkadinks Spray - Imagination Crafts
Mr Huey Shine Spray
Distress Pad, Black Soot
Blue lace, black ribbon and black flower from my stash
Winsor & Newton Galeria Matt Medium - 250ml

01 November 2014

#128 November - Christmas Card Challenge

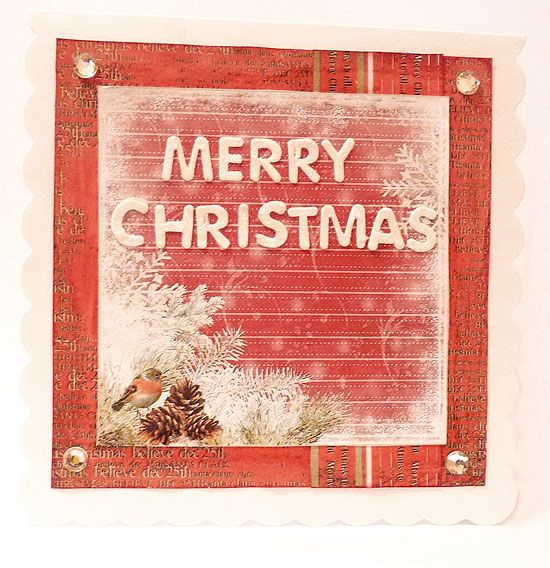
Hey...it's the 1st of November already! It's time for a new challnge at Bearly Mine Challenges! I hope you will join us this month for our challenge theme "Christmas Cards." You know it's that time again where the closer it gets to Christmas the less time there is for crafting so get those cards done now and join us! Here is my simple Christmas card:

I know it's hard to tell but I coated the backing paper with fine silver glitter and I added chunkier silver glitter to the birds and snow. The letters are also glittery and are from a sticker sheet alphabet I got at Hobbycraft. All 3 papers are printed out from the Bearly Mine Designs Christmas Traditions 2 digital paper set. It sure is ashame you cannot see all the glitter...lol.

Thanks for looking and hope you will join in the challenge!

Happy Crafting!
Dorothy
24 October 2014

DSC #111 - Steampunk Tag

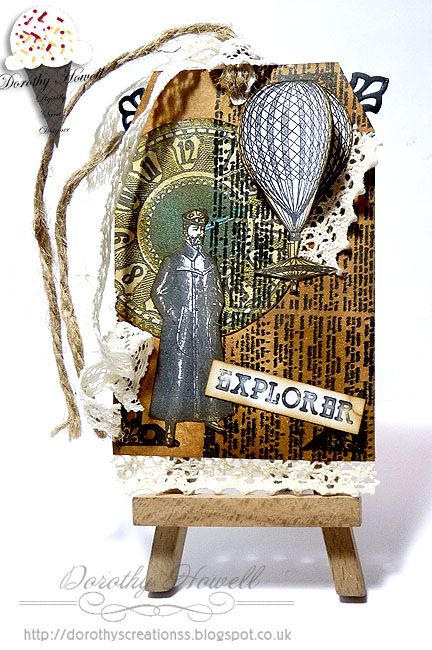
Welcome to this Friday's design team project for Digitally Sweet Challenges! I hope you all will like this week's theme of STEAMPUNK! Our sponsor this week is the wonderful Lunagirl! Come join us and show off you use of steampunk digital images. This week I made a tag:


I started with a 3" x 5" tag I made out of cardstock. I nked all over it with Vintage Photo Distress Ink. I glued down one of the Lunagirl clockface image then stamped over it all with a Kaisercraft clear stamp called . Then I distress other Lunagirl images overtop and the "Explorer" word art I made in Photoshop. I stamped some corners on there as well. I made the balloon look 3D by printing it off twice and layering one on top of the other and added lace to the bottom and tucked some behind the balloon. This is my very first steampunk project as it's not my usual style but I'm happy with how it turned out...hope you all like it!

SUPPLIES USED
All images - Lunagirl
Distress Ink - Vintage Photo
Fine print stamp - Kaisercraft clear stamp called Dictionary Meanings
Corner Stamp - Papermania Urban Stamp set called Type Print
Jute Twine
Lace from stash

Happy Crafting!
Dorothy

23 October 2014

Bearly Mine Inspiration - Christmas ATCs

Hi everyone! It's the 23rd so it's time for me to show off the wonderful digital papers from Bearly Mine Designs! For this project I made ATCs...little 2.5" x 3.5" pieces of art! I went with a Christmas theme to show off the new holiday papers new out this month:

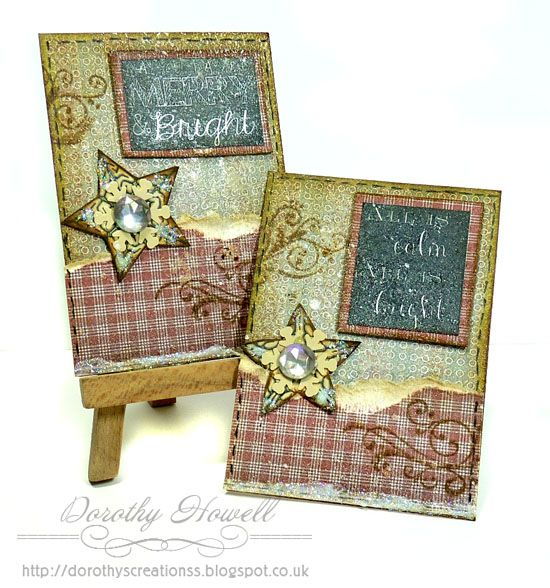
These little ATCs have a country Christmas feel to them. I started with a few digital papers from the Bearly Mine Designs "Christmas Joy" set.


I distressed the edges with Vintage Photo and Antique Linen Distress Inks. I tore one of them to add another paper layer. I stamped a swirl with Vintage Photo then added 2 Christmas chalkboard sentiments I got off of Pinterest. I also printed out some stars I created in Photoshop. I wanted a textured feel to these so first I spritzed the cards with Tsukineko's Goosebumps Clear Texture Spray. This stuff is pretty cool. It gives a slightly satin clear finish from a spray bottle. You can use it for texturising, or resist techniques. I also spritzed with a little Mr Huey's Opaque White mist which caused the little paint splatters. Across the bottom I made some glittery "snow" and I faux stitched the edges too.

Our October Challenge is in full swing so go over and check out the latest challenge at Bearly Mine Challenges. We would love to have you join us!

Happy Creating!
Dorothy

01 October 2014

Challenge #273 - Use Orange

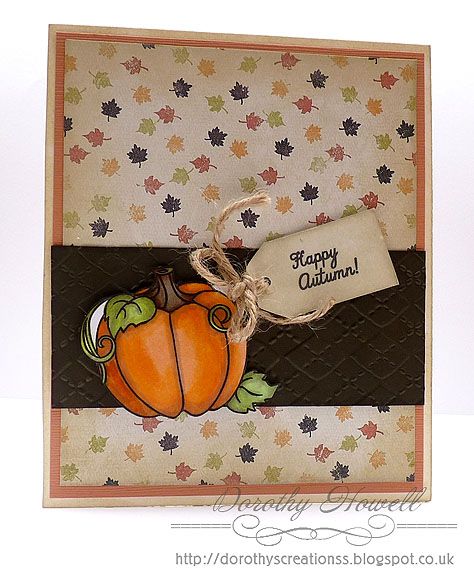
Two weeks gone and it's time for a new challenge at Crafty Creations Challenges! Our theme this time around is to use orange in your project. Our sponsor is Robyn's Fetish and I used one of her gorgeous images. I made a Happy autumn card:

First I coloured in the Fall Pumpkin digital stamp with my copic Ciao markers. Then I fussy cut it out. I took a white card base, inked the edges with Linen Distress Ink. On top I layered burnt orange card, the fall leaf digital paper from a digital scrapbooking kit then some dark brown card that I embossed with a folder and my Cuttlebug. I added a tag I also distressed with the Linen ink. I added jute twine to the tag. A simple yet effective card!

SUPPLIES USED:
Robyn's Fetish Fall Pumpkin digi stamp
Fall Leaf paper from digi kit - "Autumn Thoughts" by Designs by Megan Turnidge
Orange and Brown card from stash
White card base from stash
Copic Ciao markers
Cuttlebug Embossing Folder Argyle
Jute Twine from stash

New Bearly Mine Challenge

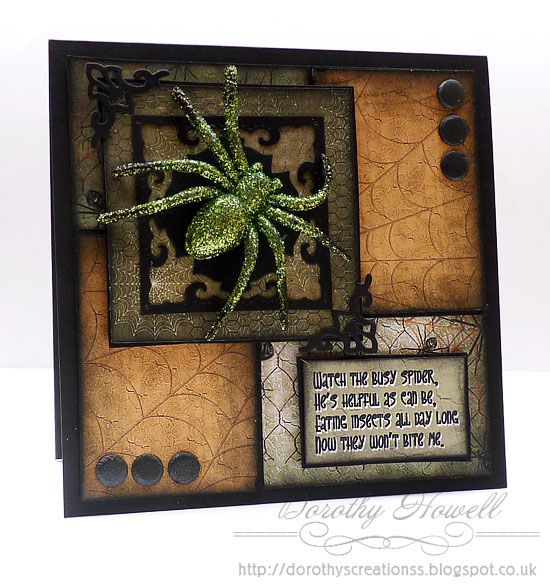
It's a new month so that means it's time for a new challenge at Bearly Mine Challenges! Join us for this month's challenge with the theme halloween. I personally don't "do" halloween so I made a card with a basic theme...SPIDERS...lol.

Whatcha think? Not halloween but still a bit scary huh? Well if you live in the UK you will know we get some really big spiders here, I mean creepy, massively huge, long hairy legged suckers. Don't what it is about the UK that breeds big spiders...lol. Anyway, I used the Bearly Mine paper set called Halloween Fantasy. I used 4 different papers and I colourised 2 of them to match in Photoshop. I edged the papers with Distress Ink in Black Soot. I placed these on a black card base. I embellished with black Card Candi, Spellbinder diecuts and a big green glittered spider I got in a pack of 4 from a local 99p Store.

SUPPLY USED:
Bearly Mine papers - Halloween Fantasy
Black Cardstock - Papermill Direct
Spellbinders - Nestabilities Marvelous Squares S4-383
Craftword Card Candi-Metropolis
Green Glitter Spider - from a local 99p Store

26 September 2014

DSC #107 Music

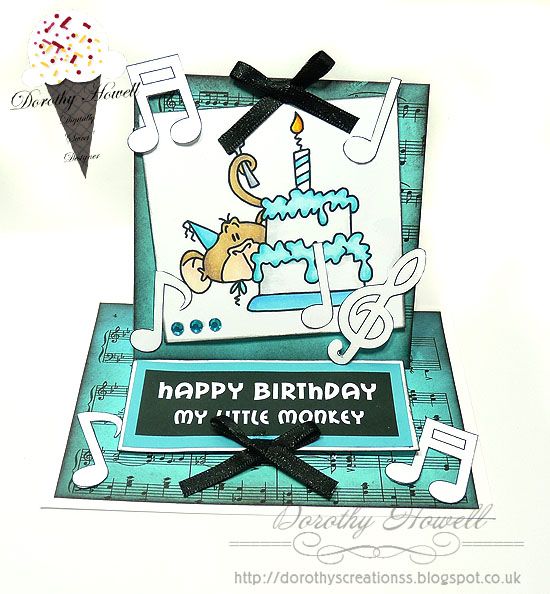
It's another Friday and it's time for the weekly challenge at Digitally Sweet Challenges! Here is my Design Team project for this week...a card:


I made an easel card this time using one of our sponsor's digi stamps. You can find this stamp here at Bugaboo Stamps. I took the stamp and coloured it in with my Copic Ciaos I then printed off a music sheet that I colourised in Photoshop and laid that as a base top and bottom all edges with Black Soot Distress Ink. I also printed out the music notes and fussy cut those out. I made the sentiment myself. Finally added 2 black bows and aqua blue gems.

Yeah I know I know...another BLUE project...lol. I know I've been using a whole lot of blue lately. Sorry about that. I'll make sure to use a diferent colour next time. I hope you enjoyed this week's card and I do hope you will join us for this week's challenge at Digitally Sweet Challenges!

23 September 2014

My Bearly Mine Inspiration Project

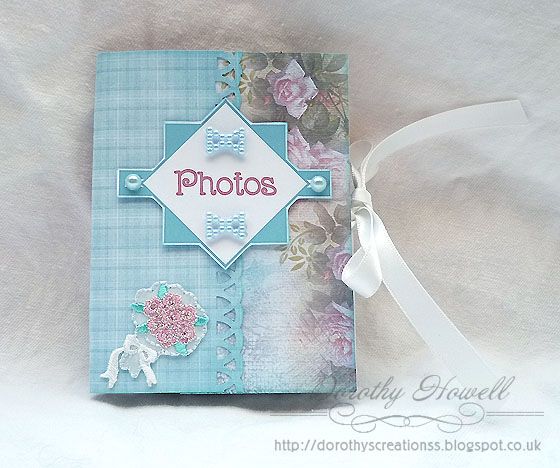
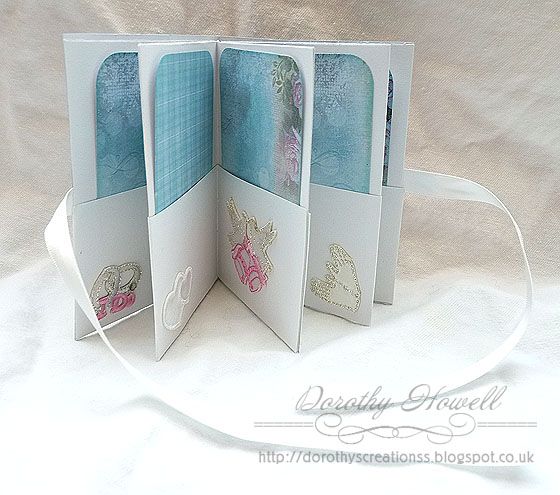
Hello all! As I posted the other day, I am one of the new Design Team gals for Bearly Mine Designs and it's my very first inspiration project using Bearly Mine digital papers. I created a cute little hybrid crafting wedding mini photo folio!

Here is what it looks like inside:

This is sute a cute and quick project to make. I followed a video tutorial by CreationsbyChristie and it uses only one sheet of 12" x 12" cardstock. I used a sheet of textured white card. I took a piece of white ribbon and glued it to the front and back covers. I covered over top the covers with papers I printed from a Bearly Mine Designs paper kit called Summer Floral Delights. I used an edge punch on a 4" x 4" square of the blue pattern to wrap the binding putting that over top a lovely rose print I also printed out eight 2 1/2" x 3 3/4" rectangles of more of the papers to make the photo mats for inside the folio. All the papers were edged in Broken China Distress Ink.

On the cover, I printed out the sentiment I created in Paint Shop Pro to match. Then put that on dimentional foam pads and added some pale blue pearl embellies from my stash. Finally I added these lovely fabric wedding stickers I just bought. They came in a big job lot of stickers I got off of eBay. The album measures 3" x 4" and it was quick and easy to make.

We have a monthly challenge on over at the Bearly Mine Challenge blog, so please check out the current challenge. I sure hope you join us! God bless your today, thank you for having a peek at my blog and, as always...

Happy Crafting!
Dorothy

CHALLENGES ENTERED:

Scribble and Scrap Challenge - Anything Goes
Crafting from the Heart Challenge - Anything Goes
Whoopsi Daisy Challenge - Bling and/or Pearls
Crafty Boots Challenge - Anything Goes
Crafty Cardmakers and more - Ribbon/Lace and Pearls
Inky Chicks Challenge - Anything Goes
Diva by Design Challenge - Anything but a Card
Ruby's Rainbow Challenge - Anything Goes
Crafty Girls Challenge - Anything Goes
Creative Fingers Challenge - Anything Goes
A Creative Romance - Anything Goes


22 August 2014

DSC #102 Guys Only

Welcome to another DT project for Digitally Sweet Challenges! Our theme this week is GUYS ONLY and we had some wonderful images to choose from given graciously for this week's sponsor Stitchy Bear Stamps. I made a masculine birthday card:

I printed out the lighthouse beach digital stamp and one of the digital papers by Stitchy Bear and added to back card  base. I coloured the digi stamp with my watercolour pencils and a water brush. I then used a die for the sides and corners in black and buff cardstock. This is the first time I've used this Spellbinders Marvelous Squares die too! I've had it in my stash waaaaay too long LOL. The sentiment is hand stamped and I added a dark beige ribbon that matched the buff card. I do make simpler style cards and I really wanted simple with this one as the image is so great. I wanted it to be the focus of the card. Hope you like it!

SUPPLIES USED:
Sunset at Sea digi stamp & backing paper - Stitchy Bear Stamps
Corner and border side diecuts - Spellbinder Die set called Marvelous Squares
Sentiment Stamp - Papermania Clare Curd's Signature Range (Sentiments)
Derwent Waltercolour Pencils
Dovecraft Premium Pigment Ink in black
Black and Buff cardstock - Papermill Direct
Ribbon from my stash

CHALLENGES ENTERED:
Papertake Weekly - To Die For (use a diecut)
Sweet Stamps - Anything Goes
Try It On Tuesday - Use your stash (ribbon and die)
Crafty Creations Challenges - Use Something Old from Stash (ribbon & Die)
Crafty Girlz Challenges - Anything Goes
Crafts 4 Eternity Challenge - Beside the Seaside
Creative Fingers Challenges - anything Goes
Suzy Bee's Bloomin Challenge - Anything Goes
Eclectic Ellapu - Seaside/Nautical and Anything Goes with Watercolours
Little Claire's Design challenges - Man's Birthday Card

08 August 2014

DSC #100 - White on White with Pink

It's Friday and time for my Design Team project for Digitally Sweet Challenges! We have reached a milestone of 100 challenges. Why not come join us? Our sponsor this week is Lunagirl. I love the images we got to work with this week. Isn't a shame that I only used a small part of one...lol.


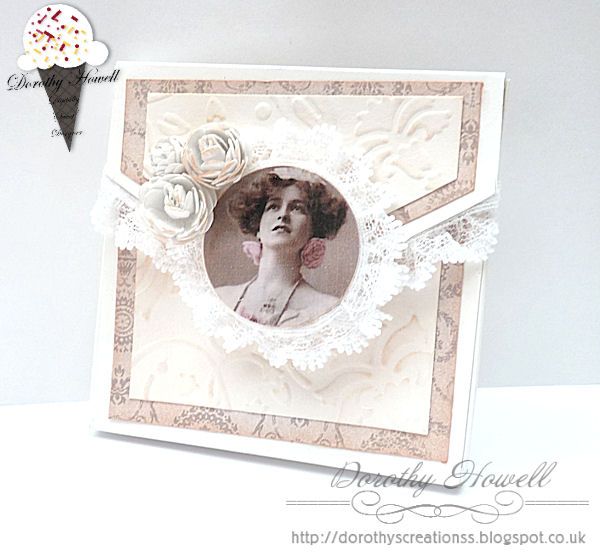
I was cleaning my craft room and I faound a small box of project I never finished. One was this 3" x 3" box with flap. It was plain white so I decided to finish it. I printed out part of the lady along with the patterened paper. I coated the lady with a few coats of glossy Mod Podge. You cannot tell but it's shiny. Then I punched out her face with a 1.5 inch circle punch. I hot glued some lace from my stash around the circle and around the edge of the box flap.

I also found a pile of backing papers I made. One was a piece of white card that I had embossed at one time. So I added some Distress Ink to it and some white roses. I added a piece of hook and loop (Velcro) to the flap to keep it closed. I think I will make some notecards to go inside...lol.

SUPPLIES USED:
Woman image - Lunagirl
Digital Pattered Paper - Far Far Hill
White Roses - Hobbycraft Brand English Roses
Embossed white cardstock - used Spellbinders M-Bossabilities folder: Enchanted Side B
Lace and white card box from my stash.
Mod Podge - Glossy
Distress Ink in Tattered Rose
Small Velcro circle

Thanks for having a look and do hope you will join in the challenge at DSC!!
Dorothy

04 April 2014

DSC #82 "Anything but a Card"

Welcome to this week's DT project for Digitally Sweet Challenges! DSC has weekly craft challenge that's all about digital! If you love scrapping and cardmaking with digital images, then come join us!

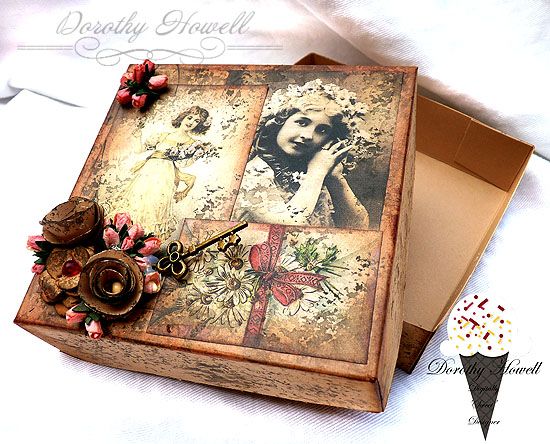
This week we are sponsored by Lunagirl Images. Lunagirl was kind enough to supply us DT members with some gorgeous vintage-y images to work with and here is what I made for you...a box:


It's always nice to have a cute little box onhand for little last minute Mother's Day or birthday gifties. This box is 4" x4" and made of kraft card. I printed and cut out 3 of Lunagirl's images then distressed the edges in Vintage Photo Distress Ink. I adhered them to the lid with matt medium, which I think turned out nice as I just LOVE the matt non shiny look. I took a piece of natural sponge and dabbed around the box with watered down Black Soot Distress Ink. I edged and dabbed the whole outside of the box to match.

I took more of the kraft card and made 3 flowers, 2 rolled ones and 1 with a Tonic flower punch. Those got distress and dabbed with the sponge as well. I added tiny Mulberry Crafts rosebuds that I coloured with a waterbrush and Fired Brick Distress Ink. Lastly I tucked in a little brass key.

It came together so quick and easy, hope you like it!

SUPPLIES USED:
Lunagirl Images - 3 vintage images
Papermill Direct - 12" x 12" Buff cardstock
Mulberry Crafts -  Off white Mulberry paper rose buds small S#151
Yummy Honey Crafts - key
Galleria Matt Medium
Beads from stash
Tonic Sm Flower Punch
TH Distress Inks - Vintage Photo, Fired Brick & Black Soot

Entering in the following challenges:
Glitter n Sparkle Challenges - Mother's Day
Dream Valley Challenge - Mothering Sunday 
Scribble and Scrap Challenge - Anything Goes
Papertake Weekly Challenge - Anything Goes
Crafts 4 Eternity - Anything but a card
Crafty Hands Challenge Blog - Shabby Chic
Seemacraft Challenge - Vintage

Related Posts Plugin for WordPress, Blogger...