The 50% Closing Down sale starts TODAY at Bearly Mine Designs:
I regret to inform you that Bearly Mine Designs will be closing their doors on December 31st. New European VAT laws are causing the closure of many small digital businesses here in the UK and all over Europe. If you sell digital goods to a European customer, you HAVE TO charge them the customer's country's VAT (sales tax) rate and each country is different. This is extremely difficult to do as there is no shop program that can do this yet. So Bearly Mine Designs is a victim of these new rules. Thing is, even if your digital selling website is outside the European Union, you still have to charge European customers their VAT rate on top of their purchase..even if your online store is in China, USA, Canada, Brazil, etc. Don't know how that is going to happen but that's what the EU is saying. The first thing I thought when I heard about this new law/rule is, "How can they enforce this outside of the EU?" I still do not know but my hope is that it's a disaster and they cancel this requirement so more small businesses selling digital goods do not disappear from the web like this.
From today until the 31st December you can save 50% off all digital sets at Bearly Mine. Please show your support by having a visit and purchasing your favourite sets.
29 November 2014
28 November 2014
DSC #116 - Anything Goes
Happy Black Friday all! I sure hope everyone in the US had a terrific Thanksgiving Day! Hubbs and I had a cozy little Thanksgiving here in the UK. My British hubby likes us celebrating this holiday since I'm American. He likes turkey dinners but tonight it was a simpler meal than I would have made if we lived back in America. Plus being just the two of us and I happen to be Vegan. I roasted him a big turkey breast though and there is plenty leftover for his sandwiches the next couple of day and for the dogs to have a bit of course...lol.
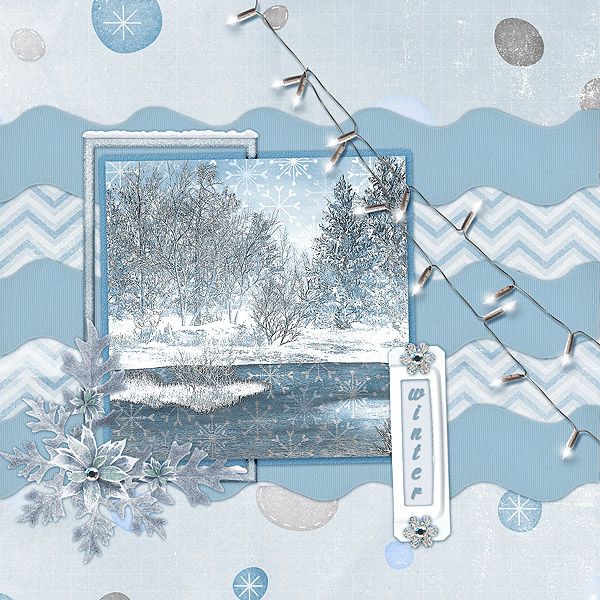
It's time for this week's challenge at Digitally Sweet Challenges and guess what? I'm the challenge hostess this week for an Anything Goes Challenge! Our sponsor is Stitchy Bear Stamps and I used a winter scene digi stamp:
The above is a digital image I created in Photoshop. I used the Lake Winter digi stamp by Stitchy Stamps at Stitchy Bear Stamps and a freebie digital scrap kit by Digilicious Designs to create this peaceul winter scene. I'm not a big lover of snow but I can appreciate a good winter scene...lol. Thanks for having a look this week and hope you will join us for this week's challegne at Digitally Sweet!
SUPPLIES USED:
Lake Winter digi stamp - Stitchy Bear Stamps
Winter Wonderland free Digital Scrap Kit - Digilicious Designs
26 November 2014
#277 Embossing Challenge
Hi all...it's time for a new challenge over at Crafty Creations Challenges! I hope you will join us this time around and enter your creation using some type of Embossing. Our wonderful sponsor this week is Beccy's Place and you could have a chance to win some lovely images from her too.
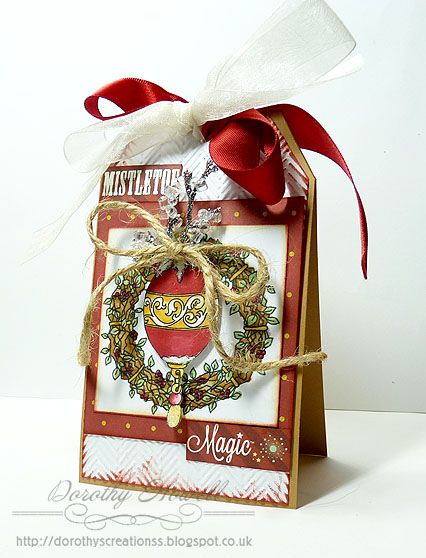
Here I used 2 different types of embossing, dry embossing with an embossing folder and embossing powder with a heat gun.
I made a tag shaped card with buff cardstock which is similar to kraft. I cut out a tag shape in white to go on after I ran it through my Cuttlebug with a chevron embossing folder. On top of that I added designer paper from My Mind's Eye along with the sentiment trimmed off that same paper. I colooured the wreat digi stamp and the ornament digi stamp with my Copic Ciaos and on the ornament's white bits, I added some clear glitter embossing powder which raised up a bit and sparkles. To "hang" the ornament I added some little crystal branches and a jute bow. LAstly I topped the tag with red and sheer white ribbon.
SUPPLIES USED:
Wreath & Ornament Digi Stamps - Beccy's Place
Red with gold dots background paper - My Mind's Eye Mistletoe Magic 12" x 12" paper set
Distress Ink in Fired Brick and Antique Linen
Cuttlebug Embossing folder - Chevron
WOW Embossing Powder in Clear Sparkle
Nutscene Jute Twine
Crystal branch taken from a larger Chriatmas sprig £1.00 at Asda
Red and white ribbons from stash
24 November 2014
Bearly Mine Inspirational Post
I know I know...I'm a day late with my Inspirational Post for Bearly Mine Designs Challenges. I had it all set up to go for TODAY only I'm a day late...UGH. Ah well I'm all posted now right? LOL.
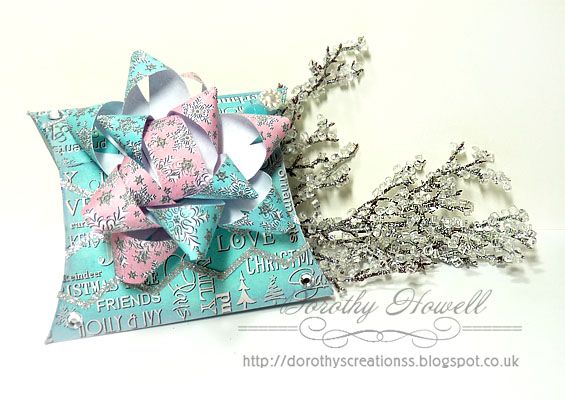
I created this pillow box with handmade bow for a cute christmas wrapping out of the lovely digital creations of Bearly Mine Designs.
I used the Christmas Ice paper kit which you can purchase HERE.

This box turned out so cute! I started off with a pillow box template that I downloaded from the Box Template Store.com. I printed it and cut it out from thin cardstock as a template. Then I printed out one of the word Bearly Mine designer papers in ice blue on the same thin card. On A4 sized 100 gsm paper, I printed out a sheet of half pink snowflake and half blue snowflake papers from BM as well. I traced the template on the back of the worded paper, cut it out and folded it all together. I did NOT cut the slot for the tab at first but waited until I folded the box up as I wanted to make sure it lined up properly which was a good thing because the slot and tab to close the box DID NOT line up properly so I marked it lightly with a pencil and cut the slot then sharpened the creases of my folds so the box was sturdy. I also distressed all the edges in Spun Sugar Distress Ink. On the outside of the box, I added silver glitter chevrons and silver gems for a bit of bling.
For the bow, I cut 3/4" strips of the A4 snowflake papers then I looped them and attached them onto a small brad alternating layers. I liked the look of mixing the pink and blue. I distressed these with Spun Sugar as well.In the upper right corner behind the bow you can sort of see the stick pin I made to stick on there.
SUPPLIES USED:
Christmas Ice paper kit - Bearly Mine Designs
Pillow box template - Box Template Store
Silver Glitter Chevron sticker - Paper Cellar (from my stash)
Silver Gems from stash
Distress Ink in Spun Sugar
Long pin and beads from stash
I created this pillow box with handmade bow for a cute christmas wrapping out of the lovely digital creations of Bearly Mine Designs.
I used the Christmas Ice paper kit which you can purchase HERE.

This box turned out so cute! I started off with a pillow box template that I downloaded from the Box Template Store.com. I printed it and cut it out from thin cardstock as a template. Then I printed out one of the word Bearly Mine designer papers in ice blue on the same thin card. On A4 sized 100 gsm paper, I printed out a sheet of half pink snowflake and half blue snowflake papers from BM as well. I traced the template on the back of the worded paper, cut it out and folded it all together. I did NOT cut the slot for the tab at first but waited until I folded the box up as I wanted to make sure it lined up properly which was a good thing because the slot and tab to close the box DID NOT line up properly so I marked it lightly with a pencil and cut the slot then sharpened the creases of my folds so the box was sturdy. I also distressed all the edges in Spun Sugar Distress Ink. On the outside of the box, I added silver glitter chevrons and silver gems for a bit of bling.
For the bow, I cut 3/4" strips of the A4 snowflake papers then I looped them and attached them onto a small brad alternating layers. I liked the look of mixing the pink and blue. I distressed these with Spun Sugar as well.In the upper right corner behind the bow you can sort of see the stick pin I made to stick on there.
SUPPLIES USED:
Christmas Ice paper kit - Bearly Mine Designs
Pillow box template - Box Template Store
Silver Glitter Chevron sticker - Paper Cellar (from my stash)
Silver Gems from stash
Distress Ink in Spun Sugar
Long pin and beads from stash
21 November 2014
DSC #115 Opposites Attract
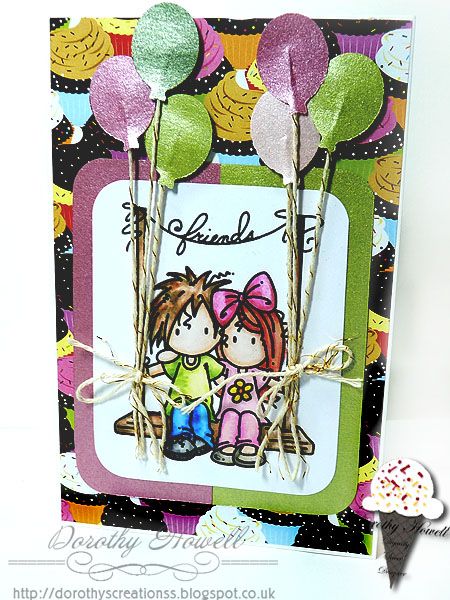
Happy Friday and welcome to this week's Design Team project and new Challenge announcement for Digitally Sweet Challenges! Join us for this week's theme of "Opposites Attact" and sponsored by Bugaboo Stamps. I made a friend card:
This stamp was so cute. I coloured it in with Letreset Promarkersand set it on a frame I made out of 2 different pealised papers. I then punched out some little balloons out of the same paper. This paper was double sided so I could get a third colour in each bunch. I had a hard time finding a designer paper that I liked then I found this 6" carstock pad of all cupcake papers and this one matched the colours so well.So come on over to Digitally Sweet Challenges and show of your crafty goodness. I can't wait to see what to enter!
SUPPLIES USED:
"Ava and Deacon Friends" digital stamp - Bugaboo Stamps
Letraset ProMarker Set (12 colours + Free Blender)
Cupcake backing paper - Paper Cellar Cupcakes 6x6 Patterned Papers
Pearlised paper and beige & gold twine from my stash.
14 November 2014
DSC #114 Photo Inspiration
It's time for another weekly challenge at Digitally Sweet Challenges! We have started a new format where there is still a new challenge each week but you have until the end of the month to get your project entered. You can read all about it here: New Rules. There is also a post about it HERE with info on our DT Call too!
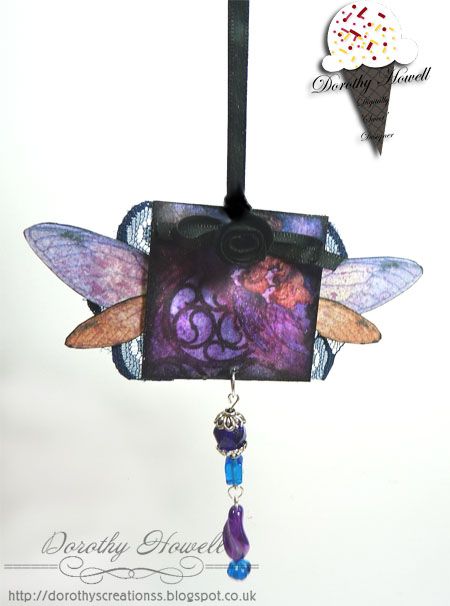
This week our sponsor is the lovely Lunagirl. I just love using Lunagirl images as I'm getting more into vintage style. Wanna win some vintage images? Then ya gotta enter the challenge for your chance! Lunagirl gave us Design Team members some images to work with and here is what I created, a hanging ornament:
Please forgive the bad photo. I took it at night and the light really stunk. This is a twinchie, a 2 inch by 2 inch piece of chipboard that I glued the digital image onto with matt gel medium. I edged the image and sides and back of the twinchie with Black Soot Distress Ink. On the back I added the printed out wings from Lunagirl and some royal blue lace which looks dark in the photo. I spritzed the wings and image with Grape Juice Inkadink spray from Imagination Crafts and I also spritzed with Mr Huey's Shine spray. I'm starting to get into beading, It's slow going but I decided to make a bead dangle. I finally added black ribbon to hang the ornament as well as a black bow and black fabric flower I made. I like how it turned out...now...where to hang it? LOL
SUPPLIES USED:
Main image and wings collage sheet - Lunagirl
Beads - Jesse James Beads Dress It Up Black Magic set
Grape Juice Inkadinks Spray - Imagination Crafts
Mr Huey Shine Spray
Distress Pad, Black Soot
Blue lace, black ribbon and black flower from my stash
Winsor & Newton Galeria Matt Medium - 250ml
12 November 2014
#276 New Challenge at Crafty Creations!
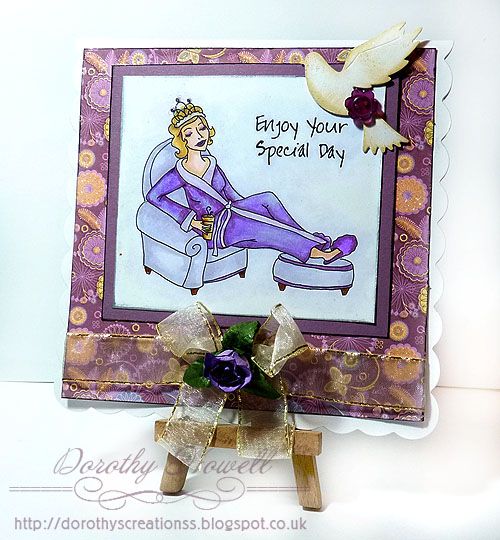
It's time for a new challenge at Crafty Creations Challenges and we do hope you will join us. Our lovely sponsor is Freshly Brewed Designs. This week's theme is "Just One." Basically use just ONE of things on your card. For example, on my card below I did one image, one designer paper, one button, one dove, one ribbon, one bow and one flower:
See how I used just one of each item. Sorry about the colours in the photo. If you saw the card in real life the colours I used on the digi stamp match the glittery designer paper. I ried to correct in Photoshop but it looked horrible so I left it. UGH.
SUPPLIES USED:
Queen for a Day digi stamp - Freshly Brewed Designs
Flowery Glitter Designer card - First Edition "Dreamcatcher" 6" x 6" paper pad.
Copic Ciao Markers
Button - from stash
Dove die cut, ribbon and purple flower - received from craft swaps.
I hope you will check out this fortnight's challenge at Crafty Creations. Can't wait to see what you create!
Happy Crafting!
Dorothy
01 November 2014
#128 November - Christmas Card Challenge
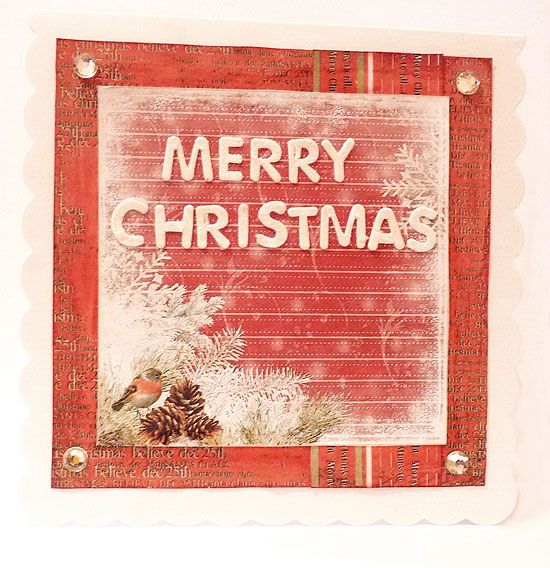
Hey...it's the 1st of November already! It's time for a new challnge at Bearly Mine Challenges! I hope you will join us this month for our challenge theme "Christmas Cards." You know it's that time again where the closer it gets to Christmas the less time there is for crafting so get those cards done now and join us! Here is my simple Christmas card:
I know it's hard to tell but I coated the backing paper with fine silver glitter and I added chunkier silver glitter to the birds and snow. The letters are also glittery and are from a sticker sheet alphabet I got at Hobbycraft. All 3 papers are printed out from the Bearly Mine Designs Christmas Traditions 2 digital paper set. It sure is ashame you cannot see all the glitter...lol.
Thanks for looking and hope you will join in the challenge!
Happy Crafting!
Dorothy
Subscribe to:
Comments (Atom)

