It's time for a new challenge at Crafty Creations Challenges! Our theme this fortnight is Something to "Die" For. To enter you will need to use some sort of die cuts on your project...who doesn't love dies?! Our lovely sponsor this week is Robyn's Fetish Stamps and you could winn some awesome digital images. I made a card for this DT project:
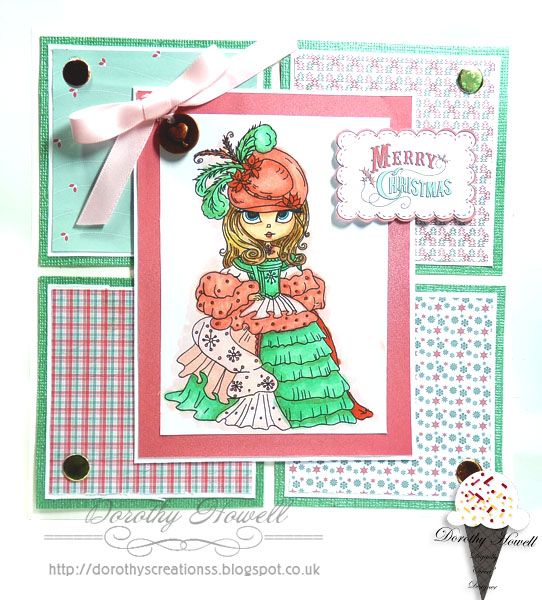
Just a simple winter time card as I just loved this digital stamp. I don't own a whole lot of dies yet but I did have one that looked kind of snowflake-like. I coloured the digi stamp with some plain coloured pencils as I wanted only a faint bit of colour. I toyed with leaving the stamp uncoloured but when it went together it really did need a little bit to tie it all in.
SUPPLIES USED:
In the Cold digi stamp - Robyn's Fetish Stamps
Backing paper - free gift from an old Papercreafter magazine, BoBunny paper set.
Snowflake dies - Spellbinders Ironwork Motifs Die
Pale blue twine - Papermania 3-Piece Capsule Collection Spots & Stripes Pastels Bakers Twine
Old Paper Distress Ink
White grosgrain ribbon bow - from stash
White scalled card base - from stash
Sentiment created by me
Hope you will join us for this challenge!
Happy Christmas Crafting!
Dorothy
10 December 2014
07 December 2014
Bearly Mine Sale Reminder
The 50% Closing Down sale continues at Bearly Mine Designs:
You can save until the 31st December on all digital sets at Bearly Mine. Please show your support by having a visit and purchasing your favourite sets.It's such a shame too. Hopefully the EU will one day be able to determine between micro digital businesses and huge mega corporations.
You can save until the 31st December on all digital sets at Bearly Mine. Please show your support by having a visit and purchasing your favourite sets.It's such a shame too. Hopefully the EU will one day be able to determine between micro digital businesses and huge mega corporations.
05 December 2014
DSC #117 Sentiment as Main Focus
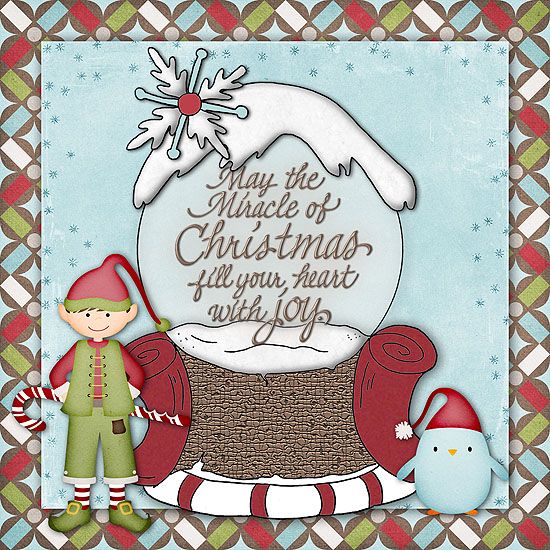
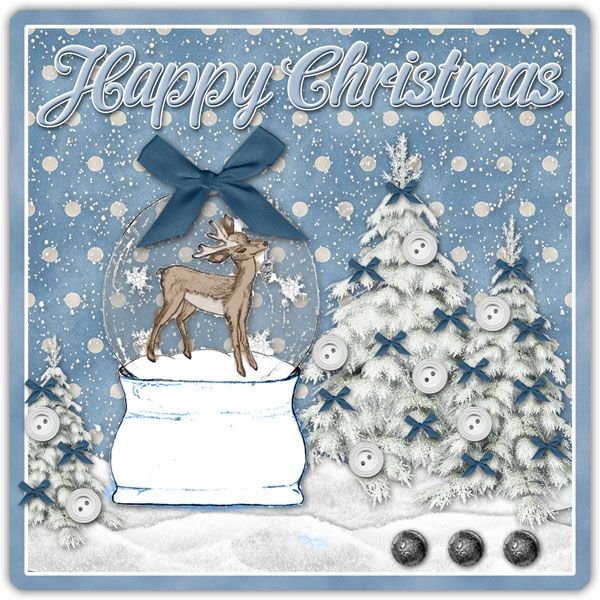
It's time for this week's new challenge at Digitally Sweet Challenges! This time our theme is to use a sentiment as the focus of your project. Our awesome sponsor this week is Lacy Sunshine Stamps! Don't forget to use something digital in your creations. I did another digital image this week, a card front:
I whipped this up in Photoshop with the very cool snowglobe digi stamp form Lacy Sunshine and a cute digi kit freebie from Cinnamon Scraps. If you click on the link it takes you right to the page to download the scrap kit yourself.Have yourselves a fantastic day and hope you will join us at Digitally Sweet Challenges!
Happy Crafty Christmas!
Dorothy
01 December 2014
December Challenge at Bearly Mine
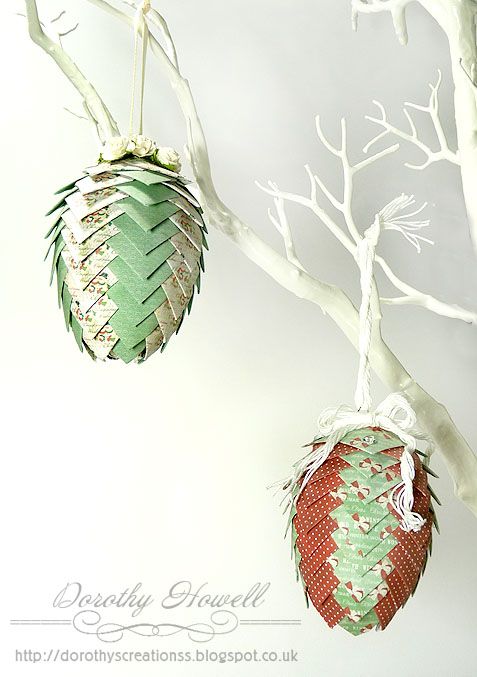
Welcome to the very last challenge for Bearly Mine Challenges. As I mentioned in yesterday's post, Bearly Mine is closing their door because of new EU ruling starting 1st January. Our challenge for December is Christmas Decoration or Ornament (no cards.) So let's see some gorgeous Christmas project entered in our challenge this month! Here is what I made, pinecone ornaments:
I saw this video by Mari Hop and thought I would give it a go using Bearly Mine digital papers from the Christmas Traditions 2 pack. Here's what I did:
Supplies to make ONE pinecone:
Styrofoam Egg (I used 80 mm eggs but next time I will use smaller ones)
2 x A4 or Letter sized sheets of designer paper, 2 different designs that coordinate.
Paper trimmer
Tacky Glue
Stuff to decorate the top of you egg
Ribbon to hang egg
Long Eye pin and large jump ring for hanging.
Directions for this larger size pinecone:
-Take your designer paper of choice and I cut them into 1 1/4" inch pieces. Keep the pile of each design separate. (In fact for my large size eggs next time I'll be making the squares 1 1/2" or most likely 1 3/4")
-One one of the square pieces, take two of the corners and fold them in halfway to about a 45 degree angle so there is a point on one side and the regular square on the other. Do this to all of the little squares.
-Start at the narrow end of the styrofoam egg, use 4 of the folded in squares in one pattern and line up the points to cover the bottom of the egg, glue them on with tacky glue, if it's a good one you shoudn't have to hold them in place too long.
-Then using the other pattern, glue 4 more on the square end on the paper piece only and glue it on making sure the pointed bit goes INBETWEEN the first row.
-Continue doing this all the way up the egg to the top.Using my sizes it will take between 36 to 40 pieces in each of the two paper designs.
How to hang:
-Before I added my flowers and bows to the top of my pinecone, I took a long eye pin for making jewellry, added a large jump ring to the eye and pushed it into the top through the paper and styrofoam. It went in quite easily. I took it out again, added tacky glue to the length of the eye pin and pushed it back into the pinecone for added strength.
-I added ribbon through the jump ring and knotted. Then I went about adding flowers and string bows to the top of my pinecones. You could add leaves, flowers, artificial pine boughs, gems, pearls, foam, die cuts, etc.
Of course if you cannot understand my directions, the Mari Hop video will help you out alot so check it out. These ornaments are easy to make and also are very light. They won't fall off the tree because they are too heavy...lol. The pinecones are also fab children's projects great for school, boy scouts, church groups, etc. You could cut up all the little squares in advance out of anything, even newspaper, craft paper or printer paper. My next one if going to be out of old book pages with lots of cream lace!
Hope you enjoyed...and also hope you join us for this month's challenge at Bearly Mine Challenges!
Happy Christmas Crafting!
Dorothy
29 November 2014
Bearly Mine Sale Starts Today
The 50% Closing Down sale starts TODAY at Bearly Mine Designs:
I regret to inform you that Bearly Mine Designs will be closing their doors on December 31st. New European VAT laws are causing the closure of many small digital businesses here in the UK and all over Europe. If you sell digital goods to a European customer, you HAVE TO charge them the customer's country's VAT (sales tax) rate and each country is different. This is extremely difficult to do as there is no shop program that can do this yet. So Bearly Mine Designs is a victim of these new rules. Thing is, even if your digital selling website is outside the European Union, you still have to charge European customers their VAT rate on top of their purchase..even if your online store is in China, USA, Canada, Brazil, etc. Don't know how that is going to happen but that's what the EU is saying. The first thing I thought when I heard about this new law/rule is, "How can they enforce this outside of the EU?" I still do not know but my hope is that it's a disaster and they cancel this requirement so more small businesses selling digital goods do not disappear from the web like this.
From today until the 31st December you can save 50% off all digital sets at Bearly Mine. Please show your support by having a visit and purchasing your favourite sets.
28 November 2014
DSC #116 - Anything Goes
Happy Black Friday all! I sure hope everyone in the US had a terrific Thanksgiving Day! Hubbs and I had a cozy little Thanksgiving here in the UK. My British hubby likes us celebrating this holiday since I'm American. He likes turkey dinners but tonight it was a simpler meal than I would have made if we lived back in America. Plus being just the two of us and I happen to be Vegan. I roasted him a big turkey breast though and there is plenty leftover for his sandwiches the next couple of day and for the dogs to have a bit of course...lol.
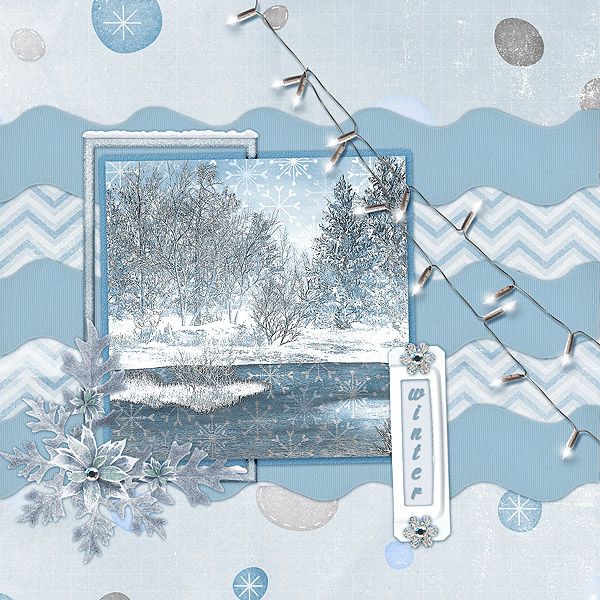
It's time for this week's challenge at Digitally Sweet Challenges and guess what? I'm the challenge hostess this week for an Anything Goes Challenge! Our sponsor is Stitchy Bear Stamps and I used a winter scene digi stamp:
The above is a digital image I created in Photoshop. I used the Lake Winter digi stamp by Stitchy Stamps at Stitchy Bear Stamps and a freebie digital scrap kit by Digilicious Designs to create this peaceul winter scene. I'm not a big lover of snow but I can appreciate a good winter scene...lol. Thanks for having a look this week and hope you will join us for this week's challegne at Digitally Sweet!
SUPPLIES USED:
Lake Winter digi stamp - Stitchy Bear Stamps
Winter Wonderland free Digital Scrap Kit - Digilicious Designs
26 November 2014
#277 Embossing Challenge
Hi all...it's time for a new challenge over at Crafty Creations Challenges! I hope you will join us this time around and enter your creation using some type of Embossing. Our wonderful sponsor this week is Beccy's Place and you could have a chance to win some lovely images from her too.
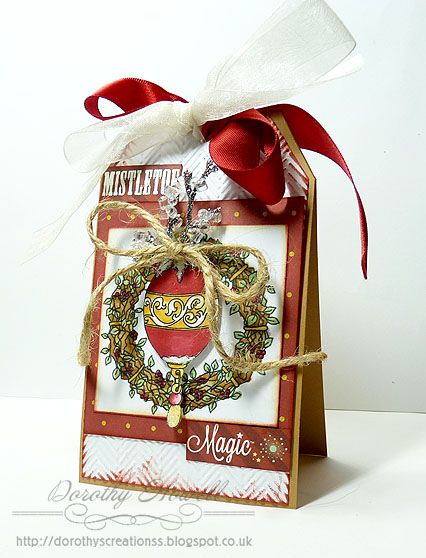
Here I used 2 different types of embossing, dry embossing with an embossing folder and embossing powder with a heat gun.
I made a tag shaped card with buff cardstock which is similar to kraft. I cut out a tag shape in white to go on after I ran it through my Cuttlebug with a chevron embossing folder. On top of that I added designer paper from My Mind's Eye along with the sentiment trimmed off that same paper. I colooured the wreat digi stamp and the ornament digi stamp with my Copic Ciaos and on the ornament's white bits, I added some clear glitter embossing powder which raised up a bit and sparkles. To "hang" the ornament I added some little crystal branches and a jute bow. LAstly I topped the tag with red and sheer white ribbon.
SUPPLIES USED:
Wreath & Ornament Digi Stamps - Beccy's Place
Red with gold dots background paper - My Mind's Eye Mistletoe Magic 12" x 12" paper set
Distress Ink in Fired Brick and Antique Linen
Cuttlebug Embossing folder - Chevron
WOW Embossing Powder in Clear Sparkle
Nutscene Jute Twine
Crystal branch taken from a larger Chriatmas sprig £1.00 at Asda
Red and white ribbons from stash
24 November 2014
Bearly Mine Inspirational Post
I know I know...I'm a day late with my Inspirational Post for Bearly Mine Designs Challenges. I had it all set up to go for TODAY only I'm a day late...UGH. Ah well I'm all posted now right? LOL.
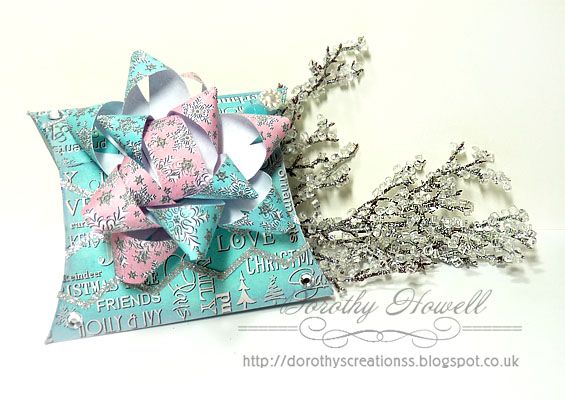
I created this pillow box with handmade bow for a cute christmas wrapping out of the lovely digital creations of Bearly Mine Designs.
I used the Christmas Ice paper kit which you can purchase HERE.

This box turned out so cute! I started off with a pillow box template that I downloaded from the Box Template Store.com. I printed it and cut it out from thin cardstock as a template. Then I printed out one of the word Bearly Mine designer papers in ice blue on the same thin card. On A4 sized 100 gsm paper, I printed out a sheet of half pink snowflake and half blue snowflake papers from BM as well. I traced the template on the back of the worded paper, cut it out and folded it all together. I did NOT cut the slot for the tab at first but waited until I folded the box up as I wanted to make sure it lined up properly which was a good thing because the slot and tab to close the box DID NOT line up properly so I marked it lightly with a pencil and cut the slot then sharpened the creases of my folds so the box was sturdy. I also distressed all the edges in Spun Sugar Distress Ink. On the outside of the box, I added silver glitter chevrons and silver gems for a bit of bling.
For the bow, I cut 3/4" strips of the A4 snowflake papers then I looped them and attached them onto a small brad alternating layers. I liked the look of mixing the pink and blue. I distressed these with Spun Sugar as well.In the upper right corner behind the bow you can sort of see the stick pin I made to stick on there.
SUPPLIES USED:
Christmas Ice paper kit - Bearly Mine Designs
Pillow box template - Box Template Store
Silver Glitter Chevron sticker - Paper Cellar (from my stash)
Silver Gems from stash
Distress Ink in Spun Sugar
Long pin and beads from stash
I created this pillow box with handmade bow for a cute christmas wrapping out of the lovely digital creations of Bearly Mine Designs.
I used the Christmas Ice paper kit which you can purchase HERE.

This box turned out so cute! I started off with a pillow box template that I downloaded from the Box Template Store.com. I printed it and cut it out from thin cardstock as a template. Then I printed out one of the word Bearly Mine designer papers in ice blue on the same thin card. On A4 sized 100 gsm paper, I printed out a sheet of half pink snowflake and half blue snowflake papers from BM as well. I traced the template on the back of the worded paper, cut it out and folded it all together. I did NOT cut the slot for the tab at first but waited until I folded the box up as I wanted to make sure it lined up properly which was a good thing because the slot and tab to close the box DID NOT line up properly so I marked it lightly with a pencil and cut the slot then sharpened the creases of my folds so the box was sturdy. I also distressed all the edges in Spun Sugar Distress Ink. On the outside of the box, I added silver glitter chevrons and silver gems for a bit of bling.
For the bow, I cut 3/4" strips of the A4 snowflake papers then I looped them and attached them onto a small brad alternating layers. I liked the look of mixing the pink and blue. I distressed these with Spun Sugar as well.In the upper right corner behind the bow you can sort of see the stick pin I made to stick on there.
SUPPLIES USED:
Christmas Ice paper kit - Bearly Mine Designs
Pillow box template - Box Template Store
Silver Glitter Chevron sticker - Paper Cellar (from my stash)
Silver Gems from stash
Distress Ink in Spun Sugar
Long pin and beads from stash
21 November 2014
DSC #115 Opposites Attract
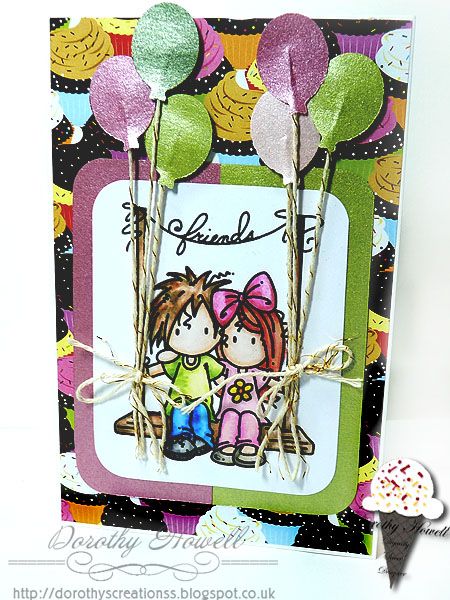
Happy Friday and welcome to this week's Design Team project and new Challenge announcement for Digitally Sweet Challenges! Join us for this week's theme of "Opposites Attact" and sponsored by Bugaboo Stamps. I made a friend card:
This stamp was so cute. I coloured it in with Letreset Promarkersand set it on a frame I made out of 2 different pealised papers. I then punched out some little balloons out of the same paper. This paper was double sided so I could get a third colour in each bunch. I had a hard time finding a designer paper that I liked then I found this 6" carstock pad of all cupcake papers and this one matched the colours so well.So come on over to Digitally Sweet Challenges and show of your crafty goodness. I can't wait to see what to enter!
SUPPLIES USED:
"Ava and Deacon Friends" digital stamp - Bugaboo Stamps
Letraset ProMarker Set (12 colours + Free Blender)
Cupcake backing paper - Paper Cellar Cupcakes 6x6 Patterned Papers
Pearlised paper and beige & gold twine from my stash.
14 November 2014
DSC #114 Photo Inspiration
It's time for another weekly challenge at Digitally Sweet Challenges! We have started a new format where there is still a new challenge each week but you have until the end of the month to get your project entered. You can read all about it here: New Rules. There is also a post about it HERE with info on our DT Call too!
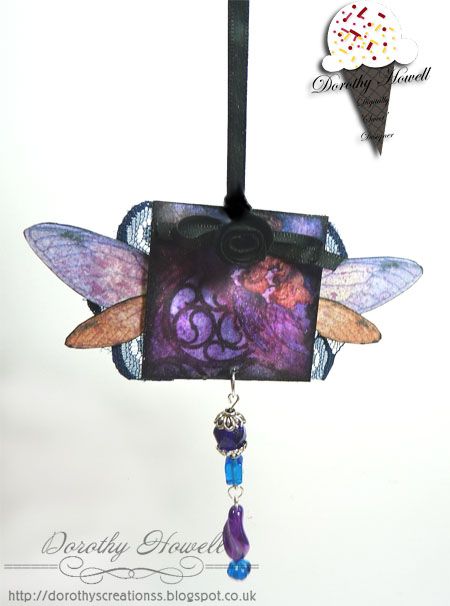
This week our sponsor is the lovely Lunagirl. I just love using Lunagirl images as I'm getting more into vintage style. Wanna win some vintage images? Then ya gotta enter the challenge for your chance! Lunagirl gave us Design Team members some images to work with and here is what I created, a hanging ornament:
Please forgive the bad photo. I took it at night and the light really stunk. This is a twinchie, a 2 inch by 2 inch piece of chipboard that I glued the digital image onto with matt gel medium. I edged the image and sides and back of the twinchie with Black Soot Distress Ink. On the back I added the printed out wings from Lunagirl and some royal blue lace which looks dark in the photo. I spritzed the wings and image with Grape Juice Inkadink spray from Imagination Crafts and I also spritzed with Mr Huey's Shine spray. I'm starting to get into beading, It's slow going but I decided to make a bead dangle. I finally added black ribbon to hang the ornament as well as a black bow and black fabric flower I made. I like how it turned out...now...where to hang it? LOL
SUPPLIES USED:
Main image and wings collage sheet - Lunagirl
Beads - Jesse James Beads Dress It Up Black Magic set
Grape Juice Inkadinks Spray - Imagination Crafts
Mr Huey Shine Spray
Distress Pad, Black Soot
Blue lace, black ribbon and black flower from my stash
Winsor & Newton Galeria Matt Medium - 250ml
12 November 2014
#276 New Challenge at Crafty Creations!
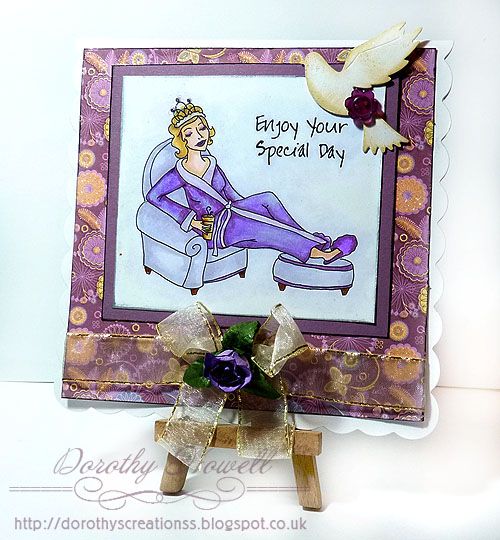
It's time for a new challenge at Crafty Creations Challenges and we do hope you will join us. Our lovely sponsor is Freshly Brewed Designs. This week's theme is "Just One." Basically use just ONE of things on your card. For example, on my card below I did one image, one designer paper, one button, one dove, one ribbon, one bow and one flower:
See how I used just one of each item. Sorry about the colours in the photo. If you saw the card in real life the colours I used on the digi stamp match the glittery designer paper. I ried to correct in Photoshop but it looked horrible so I left it. UGH.
SUPPLIES USED:
Queen for a Day digi stamp - Freshly Brewed Designs
Flowery Glitter Designer card - First Edition "Dreamcatcher" 6" x 6" paper pad.
Copic Ciao Markers
Button - from stash
Dove die cut, ribbon and purple flower - received from craft swaps.
I hope you will check out this fortnight's challenge at Crafty Creations. Can't wait to see what you create!
Happy Crafting!
Dorothy
01 November 2014
#128 November - Christmas Card Challenge
Hey...it's the 1st of November already! It's time for a new challnge at Bearly Mine Challenges! I hope you will join us this month for our challenge theme "Christmas Cards." You know it's that time again where the closer it gets to Christmas the less time there is for crafting so get those cards done now and join us! Here is my simple Christmas card:
I know it's hard to tell but I coated the backing paper with fine silver glitter and I added chunkier silver glitter to the birds and snow. The letters are also glittery and are from a sticker sheet alphabet I got at Hobbycraft. All 3 papers are printed out from the Bearly Mine Designs Christmas Traditions 2 digital paper set. It sure is ashame you cannot see all the glitter...lol.
Thanks for looking and hope you will join in the challenge!
Happy Crafting!
Dorothy
31 October 2014
DSC #112 Anything Goes
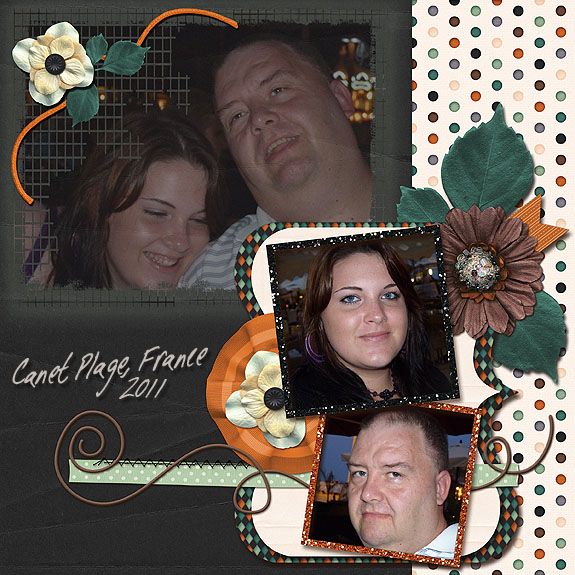
Here I am with my latest Design Team project for Digitally Sweet Challenges and we have an easy these this week...ANYTHING GOES! So I know lots of you will join in the fun. We have a new sponsor this week that anyone who loves digi kits will love: Scrappiness Designs! She was kind enough to provide the DT with one of her adorable digital scrapbooking kits and I did myself a layout:
This is my hubby and daughter back in 2011 while we were on our summer holiday to Canet Plage, France. This was one evening while sitting outside along the beach at one of the many bars and restaurants. We've spent a few summers here as we rent a wheelchair accessible apartment and spend a few weeks at the beach. It's not far from the border of Spain as well so we usually drive down to Barcelona while there. We LOVE Barca...amazing city!
SUPPLIES USED:
Digital Scrap kit called "My Backyard - Bundle" - by Scrapiness Designs
Thanks for looking and hope you will join in the challenge at Digitally Sweet Challenges!
Happy Scrapping!
Dorothy
29 October 2014
#275 Buttons, Brads and Bows
Hi all...it's time for a new challenge at Crafty Creations Challenges! Join us every other week for a new challenge and this week's theme is Buttons, Brads and Bows. Use all of these on your crafty creations and join in the challenge! Our terrific sponsor this week is A Creative Need and you could win some awesome digital images from them! Here is my design team project using one of A Creative Needs gorgeous images:
My printer malfuntioned so I wasn't able to print off any digi stamps so I decided to go with a completely digital image! I opened Photoshop and created this cute little card front that could be printed off and placed on a card or craft project. I really liked how it all turned out, hope you do too.
SUPPLIES LIST
Snowglobe with Reindeer digital stamp - A Creative Need (links directly to image page)
Brat Pack Blog Train Santa's Workshop free digital scrap kit - MediEvil Creations
27 October 2014
A Swap and a Haul
I have a busy week ahead wth lots of DT projects crafty work due (YEAH) and lots of real bookeeping work due (BOO.) Thought I would start of the week showing off my latest swap over at UK Ireland Craft Swap FB group and show off a mini Hobbycraft haul from yesterday.
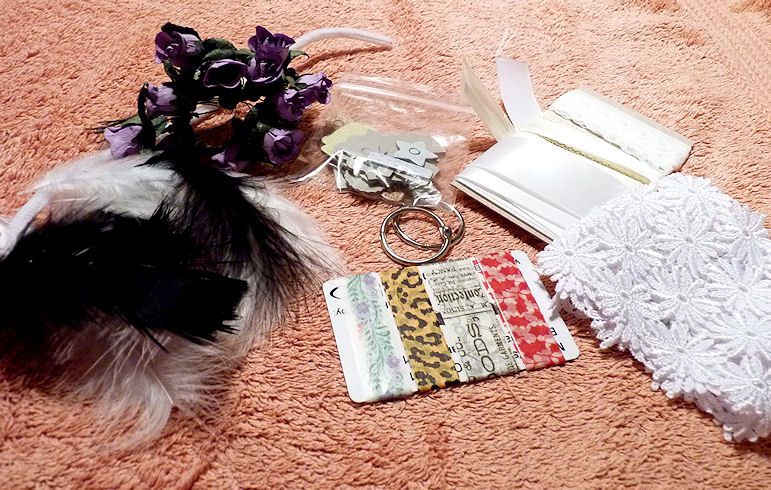
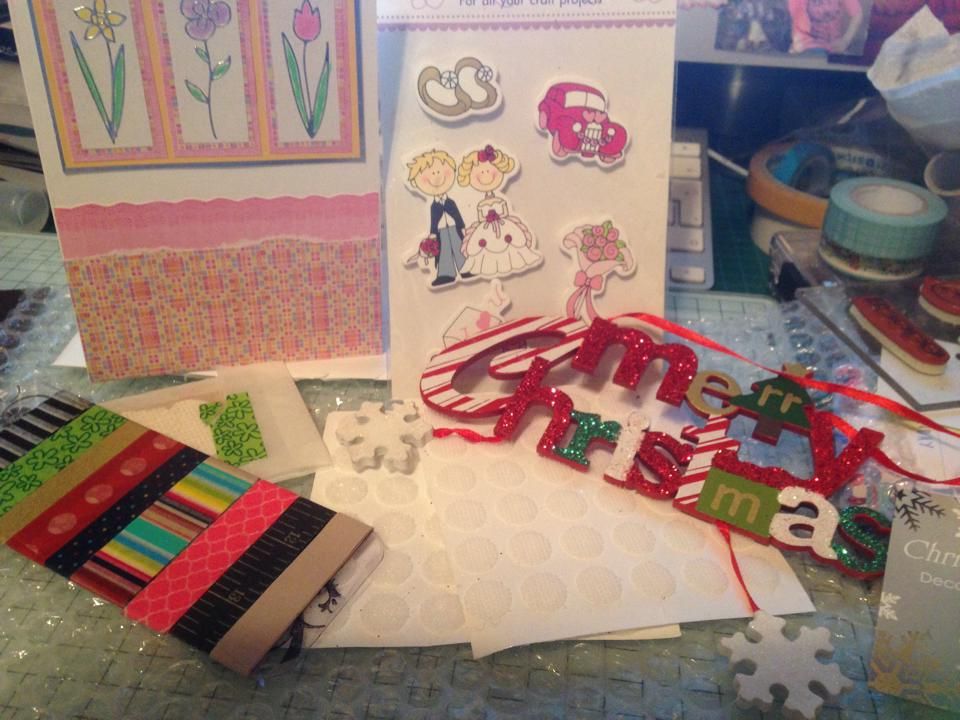
First the swap! This swap had us sharing our stash of washi tape with a partner. My partner was Tina and here is what we swapped. Tina sent me an old gift card wrapped with four diffferent washi tapes. they were all so pretty. A couple of them vintage looking which I really liked. She also sent me lots of black and white feathers, lace, ribbons, chipboard bits and some lovely purple flowers.
Here are the things I sent to Tina. I took some thick plastic packaging and cut out two rectangles the same width as a gift card but made it almost double the length. Then on one of the plaastic pieces I stamps some swirls with Stazon ink, I used Glossy Accents to glue the pieces together to make it thicker like a card. I rounded the corners and punched a hole to run some ribbon through. I wrapped lots of washi around it. When the washi is gone, it could make a nice bookmark for her trusty Filofax...hee hee hee. I also sent her a Christmas ornament, some hook and loop (Velcro) circles, stickers and burlap butterflies.
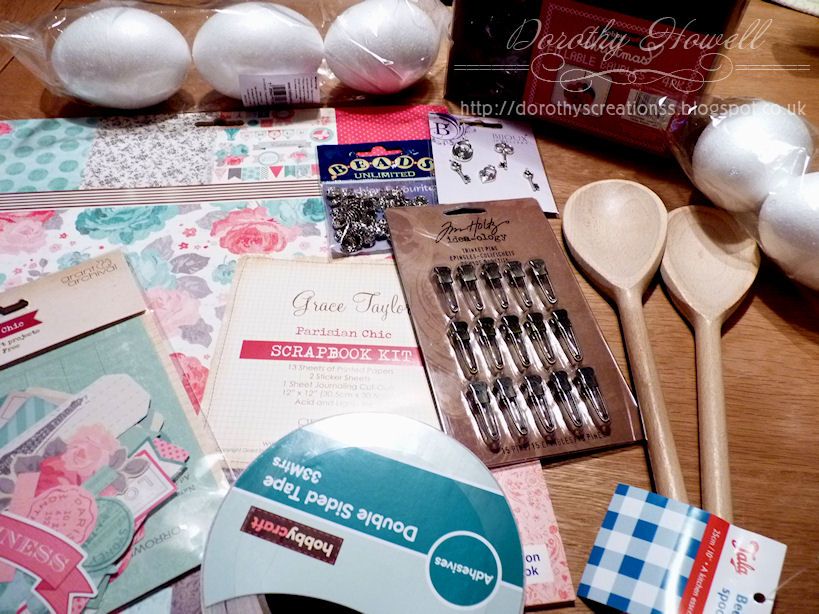
Well after church on Sunday, hubby took me over to the local Hobbycraft because I was wanting some styrofoam eggs to make these cool Christmas ornaments I plan to do so while I wandered around Hobbycraft, hubby went to run another errand. Letting me loose by myself ya just KNOW I bought more than just eggs. Yup I did. I had to control myself because 1. Hobbycraft is expensive and 2. I'm trying to budget my crafty spends per month. So here is what I came out with totalling under £25.
As you can see I got myself 6 styrofoam eggs. But the shop really started as I entered the door. My Hobbycraft has lots of bins right inside the door with goodies in them. So I picked up a roll of double sided tape and those 2 wooden spoons (£1 each.) I also grabbed some clear large bauble ornaments that are fillable. Then I hit the bead section. Oh my it's so much bigger now with really gorgeous beads. I restrained myself and only bought some bead caps and a set of charms. Then I found the Tim Holtz section, which thankfully was mostly empty but I picked up some garment clips as I've never used them before but the look useful. Last area I looked was at the paper. This 12" x 12" Grace Taylor pad called "Parisian Chic" was on sale for £5 so picked that up as well as some matching cardboard pieces for £2.50. I know it's all a little haphazard but I'm a relatively new crafter and I don't have much stash. I lack embellishments really. But I do have some things to work on now (not that I didn't before lol) but I'l have a think on those spoons (shall I do Christmas or simply Vintage style?) and clear baubles. I'm planning a mini album with the paper and matching pieces. Whew...better get myself in that craft room of mine and get to work!
Thanks for reading and Happy Crafting!
Dorothy
24 October 2014
DSC #111 - Steampunk Tag
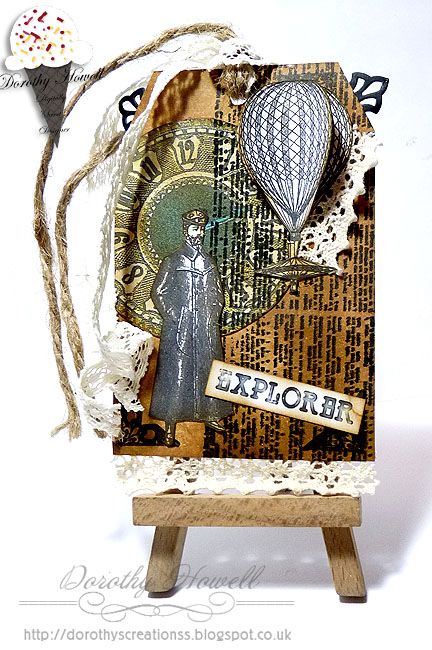
Welcome to this Friday's design team project for Digitally Sweet Challenges! I hope you all will like this week's theme of STEAMPUNK! Our sponsor this week is the wonderful Lunagirl! Come join us and show off you use of steampunk digital images. This week I made a tag:
I started with a 3" x 5" tag I made out of cardstock. I nked all over it with Vintage Photo Distress Ink. I glued down one of the Lunagirl clockface image then stamped over it all with a Kaisercraft clear stamp called . Then I distress other Lunagirl images overtop and the "Explorer" word art I made in Photoshop. I stamped some corners on there as well. I made the balloon look 3D by printing it off twice and layering one on top of the other and added lace to the bottom and tucked some behind the balloon. This is my very first steampunk project as it's not my usual style but I'm happy with how it turned out...hope you all like it!
SUPPLIES USED
All images - Lunagirl
Distress Ink - Vintage Photo
Fine print stamp - Kaisercraft clear stamp called Dictionary Meanings
Corner Stamp - Papermania Urban Stamp set called Type Print
Jute Twine
Lace from stash
Happy Crafting!
Dorothy
23 October 2014
Bearly Mine Inspiration - Christmas ATCs
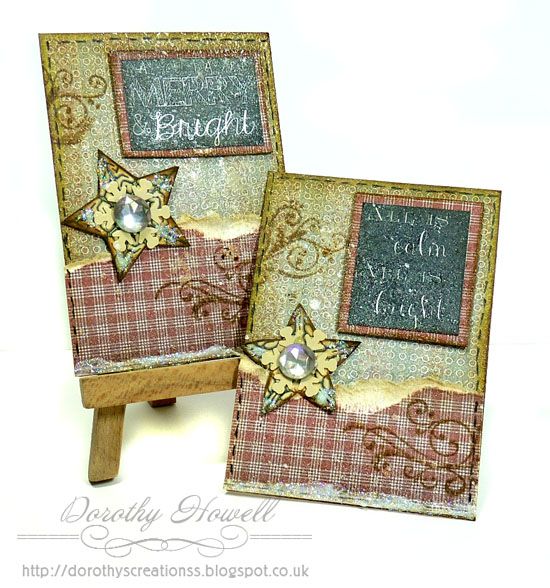
Hi everyone! It's the 23rd so it's time for me to show off the wonderful digital papers from Bearly Mine Designs! For this project I made ATCs...little 2.5" x 3.5" pieces of art! I went with a Christmas theme to show off the new holiday papers new out this month:
These little ATCs have a country Christmas feel to them. I started with a few digital papers from the Bearly Mine Designs "Christmas Joy" set.
I distressed the edges with Vintage Photo and Antique Linen Distress Inks. I tore one of them to add another paper layer. I stamped a swirl with Vintage Photo then added 2 Christmas chalkboard sentiments I got off of Pinterest. I also printed out some stars I created in Photoshop. I wanted a textured feel to these so first I spritzed the cards with Tsukineko's Goosebumps Clear Texture Spray. This stuff is pretty cool. It gives a slightly satin clear finish from a spray bottle. You can use it for texturising, or resist techniques. I also spritzed with a little Mr Huey's Opaque White mist which caused the little paint splatters. Across the bottom I made some glittery "snow" and I faux stitched the edges too.
Our October Challenge is in full swing so go over and check out the latest challenge at Bearly Mine Challenges. We would love to have you join us!
Happy Creating!
Dorothy
17 October 2014
DSC #110 - Your Hero
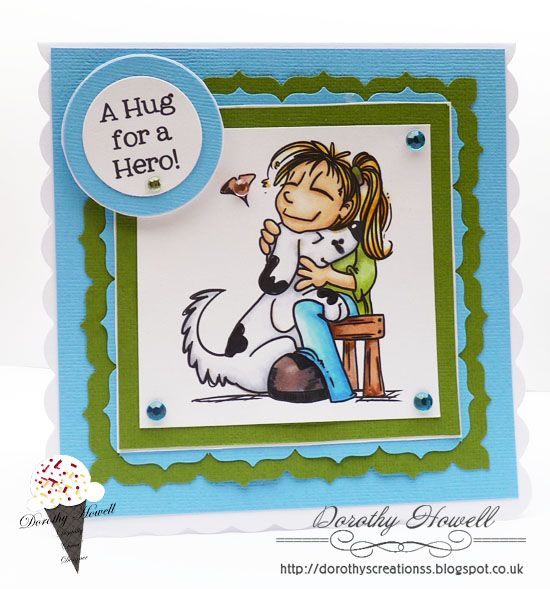
Happy Friday all! It's time for this week's challenge at Digitally Sweet Challenges and our sponsor this week is Bugaboo Stamps! Our theme this week is "Your Hero" but this could have many takes on it such as a friend, parent,dog...lol, or just someone or some position you admire like fireman, military, nurse, etc. We would love for you to join us! Here is the card I made this week as an example:
Look...NO distress ink! LOL. I just used lots of layers for this simple card as I really wanted the image and sentiment to stand out. I love dogs and one day soon I'll introduce you to my two fuzzy puppykids Buster and Paris. When I saw this image I knew I had to use it! Of course this also is me at least 10 times a day...hugging my dogs....lol.
SUPPLIES USED:
GirlPuppyLove digi image - Bugaboo Stamps
Scalloped white card blank - Cards UK bought in The Range
All cardstock - American Crafts Tropical collection
Border Punch - Fiskars Punch called Bracket Border
Copic Ciao markers
Gems from stash
Have a Happy Crafty Day!
Dorothy
16 October 2014
Challenge #274 Thinking of You
Here I am a day late and dollar short for this challenge round post for Crafty Creations Challenge. I have a good reason, I am so so sick. I had the start of a chest infection, then I coughed really hard and pulled a mucle in my chest. Talk about excrutiating pain...OUCH! Then the chest infection went full blown. No eating, no sleeping = UGH. Enough about me, now on to the newest challenge!
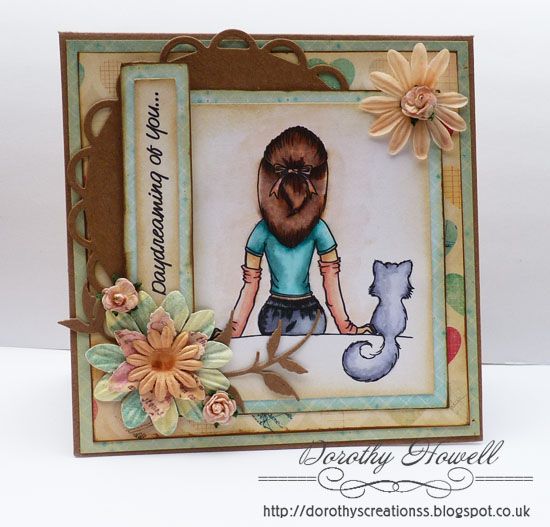
This week's theme at Crafty Creations is "Thinking of You" and we do hope you will join in. Our lovely sponsor is San's Designs..check out her shop..it's has gorgous digis. Here is the card I made as a Design Team member:
I took a craft card blank then mat and layered papers edged in Distress Ink. Then just layered up my embellies: the lacey circle diecut, the image coloured with Copics, the sentiment I made myself, leafy diecut and flowers.
SUPPLIES USED:
Waiting 4 U digi stamp - San's Designs
6" x 6" kraft card base by Papermania Square Card Blanks w/ Envelopes
Designer papers - Crate Paper "Fourteen" 6" x 6" paper pad
Larger Flowers - from old Prima Flowers Tubes bought off of QVC years ago.
Small Flowers - Mulberry Crafts UK
Large Diecut - Spellbinders Nestabilities Dies-Lacey Circles
Leafy Diecut - Poppystamps Lovely Tendril Style #956
Copic Ciao markers
Distress Ink in Antique Linen
Happy Craftin All!
Dorothy
10 October 2014
DSC #109 - Sports
It's be a week since i've posted and I missed last week's challenge at Digitally Sweet because of my birthday goings on. I'm back this week with another easel card and our theme for our challenge is SPORTS. Make a crafty project with a sports theme and using some sort of digital image on it then come on over to Digitally Sweet Challenges and enter! You could win some gorgeous digi treats from our sponsor Stitchy Bear Stamps!
Here's my easel card:
I started with an A6 blank card in medium blue and folded it into an easel card shape. I coloured in the Trophy Bowler digi stamp with my Copic ciaos and printed out my own sentiment. I cut out the sentiment and the bowling ball will circle dies and I used white gelly pen to highlight the holes of the bowling ball. For the matted layers I used black cards and paper from the Stitchy Bear paper set called King of the Couch. Extras added was a sheer stripe gray ribbon and black card candi.
SUPPLIES USED (All links go to product)
Trophy Bowler digi Stamp - Stitchy Bear Stamps
King of the Couch Papers - Stitchy Bear Stamps
300 GSM Black Cardstock - Papermill Direct
Blue Card base & White cardstock - from my stash
Spellbinders Die Large Standard Circle Nestabilities
Sheer Stripe Gray Ribbon - Ribbon Oasis
Candi Dot Embellishments .35oz-Metropolis
09 October 2014
Dominoes & Art Tile Swap
OOPS...I forgot to post about this earlier in the week. I guess I was still in birthday mode with getting absolutely nothing done for a week...lol. I particiapted in a crafty swap over at UK and Ireland Craft Swaps. I was paired up woth Donna, which was cool as she lives in the same town I do.
The swap rules were to make a set of 3 inchie art tiles, any theme we wanted and a set of 3 altered dominoes.
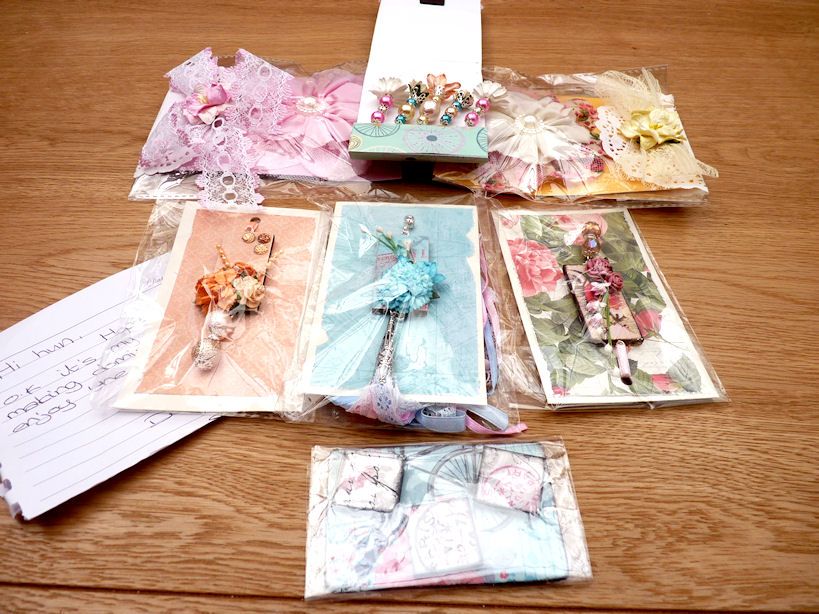
First let em show off what Donna sent me. I got this weeks ago, she was so fast! Me, I'm slooooowww.
It's kind of hard to see them as I rushed to get the photo done. I should have taken them out of the plastic first. Ah well, lesson learned there. The art tiles are really hard to see but they are pretty, trust me! The middle items are the dominoes. She didn't use real dominoes but thick MDF ones from Fernli Designs methinks. Each is mounted on its own pretty cardstock base. She also put dangles on them all too. All of them are simply gorgeous! The top items are some extra goodies she made me. She made me 2 handmade lace flowers in adorable packaging and a set of homemade jewelled stick pins. I love them all! I don't do much beading or dangly bits so I always appreciate things like that.
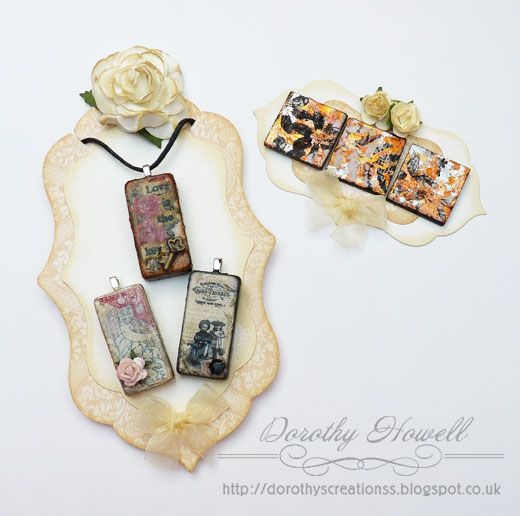
Here are the altered dominoes and art tiles I made for Donna. She did receive mine and has seen them. I'm glad she liked them too.

Ultra Thick Embossing Powder (generic brand)
Indigo Blu Lancashire Rose Guilding Flakes
Indigo Blu Flitter Glue
Thanks so much for reading! Hope you enjoyed and...
Happy Crafting,
Dorothy
The swap rules were to make a set of 3 inchie art tiles, any theme we wanted and a set of 3 altered dominoes.
First let em show off what Donna sent me. I got this weeks ago, she was so fast! Me, I'm slooooowww.
It's kind of hard to see them as I rushed to get the photo done. I should have taken them out of the plastic first. Ah well, lesson learned there. The art tiles are really hard to see but they are pretty, trust me! The middle items are the dominoes. She didn't use real dominoes but thick MDF ones from Fernli Designs methinks. Each is mounted on its own pretty cardstock base. She also put dangles on them all too. All of them are simply gorgeous! The top items are some extra goodies she made me. She made me 2 handmade lace flowers in adorable packaging and a set of homemade jewelled stick pins. I love them all! I don't do much beading or dangly bits so I always appreciate things like that.
Here are the altered dominoes and art tiles I made for Donna. She did receive mine and has seen them. I'm glad she liked them too.
I didn't photo the extra bits I gave her. Mine weren't as nice as hers...lol. I sent her some laser cut wood bits, lace and stickers. For mine I used real dominoes. These are not the big ones but are a pack of smaller size donimoes that are perfect for necklaces. I measured the domino and printed out 3 digital images that I resized to correct size in Photoshop. Then I looked for colours to colourise the sides and backs of the dominoes. One coloured with my black Copic marker. For the roses image I used Ranger Alcohol Ink in Cappucino and using that and blendng solution to get a marbled look to it. On the pale image one I painted it with Mother of Pearl acylic paint. I cut the images and glued them onto the dominoes with Glossy Accents. I sealed the whole dominoes front and back with Mod Podge so the ink jet prints wouldn't blur. Then to seal the top and image I used Ultra Thick Embossing Powder and my heat gun. These gave the top a slightly rippley shiny look which I liked. Then I added the embellishment to each: a little metal key, a black gem and a flower.
I wanted these to be used as a necklace or something your could hang onto something else so I added bales to them with E6000 glue. Then I made my very first necklace! I took black waxed cord, a lobster clasp, jump rings and bar ends and put them all together myself. I had to make sure it all fit through the bales so it could be interchanged between the dominos.
For the art tiles I started with 2 mm greyboard that I cut into 1 inch squares. I glued the 3 images I printed out on them. Then I had a think about what else to do to them. I've made a few art tiles before that turned out nice but I wanted an Autumnal theme to match the vintage images. Then I saw it...my Indigo Blu jar of guilding flakes in Lancashire Rose. These guilding flakes are a mixture of gold, copper, silver and fushia metal flakes. GORG! SO I had a dig through my stamps to see what I could stamp over top and I wanted lots of shine so I chose a Penny Black stamp with lots of solid background. I stamped on the tiles with the Indigo Blu glue, added the guilding flakes, scooched off the excess, used Black Soot Distress ink to colour the sides and back of tiles, sealed with Mod Podge then again used Ultra Thick Embossing Powder on the top. I love how they turned out!
I used my X-Cut Doorplate dies to make the display backings out of cardstock then added a little bow and flowers.
Images Used:
Black & Cream image of label words and 2 children domino - Astrid's Artistic Efforts
Dark Roses with Key image domino - Lilac - n - Lavender
Pale birdie image domino - I forgot and can't find it now. :(
Art Tile Images all from Lilac- n - Lavender
Other Supplies Used:
Stamps Used - Penny Black Cling Stampset called Every Happiness
Xcut 5-Piece Large Nesting Dies DoorplateUltra Thick Embossing Powder (generic brand)
Indigo Blu Lancashire Rose Guilding Flakes
Indigo Blu Flitter Glue
Thanks so much for reading! Hope you enjoyed and...
Happy Crafting,
Dorothy
02 October 2014
Happy Birthday to ME!
Photo courtesy Screenwallpapers.net
Yep...it's my birthday...I'm gonna party like it's my birthday! LOL It's a BIG one too...I am 50 years young today. Hubbs asked me if I felt like an old lady...sheesh. I had to remind him that although I am older than he is, I'm not THAT much older and he will be catching me up soon enough. Then he informed me that he already felt like an old man...double sheesh!
So it's not just a special day but my birthday is lasting a few days. It started last night with Hubbs and I going to The Arsenal match at Emriates Stadium. Hubbs bough me a new home shirt...here's me outside the stadium wearing it:
OK confession time.. I DETEST having my photo taken. There are many reason why I suppose, mostly it's because I've always been very overweight. I can honestly say (shockingly!) that I like this one of myself. I mean it's alright. I've really changed how I eat and it's working. I got lots more to lose and you cannot see my big roll of fat and loose skin down around my lower abdomen but hey. It's so hard to be objective of yourself, especially when you ain't so confident in how you look (like me!) Just to compare, here's a photo of me a few years ago with my daughter in Biarritz, France:
Back in April of this year (2014) I had a mini stroke. It was a huge wake up call and I decided it was time to get my health back or at least do what I could. Being a paraplegic causes all kind of health probs as well as being so fat. Drastic times called for drastic measures and after months of trying to find the best lifestyle for me, I became vegan. In fact I am a Raw Til 4 Vegan. You can find out more about this at RawTil4.com. I love the food I eat and it's making me more aware of what I put on the inside AND outside of my body.
I know my blog is mostly about crafting and I don't go into my private life too much but I'm hoping to change that. I'd like to take my blog on a journey with me this year, my 50th year on planet Earth. I'd like you to get to know me through my faith (I'm a Christian,) my food (I'm a Vegan) and my free time (I'm a Crafter.) I hope you will join me on this journey.
Thanks for reading...have a wonderful day...God bless...and as always...
HAPPY CRAFTING,
Dorothy
01 October 2014
Challenge #273 - Use Orange
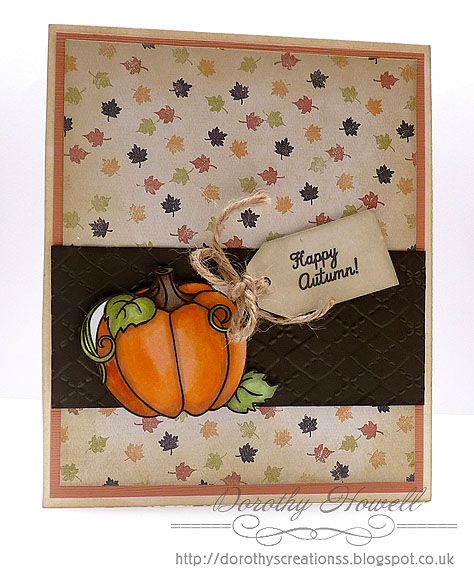
Two weeks gone and it's time for a new challenge at Crafty Creations Challenges! Our theme this time around is to use orange in your project. Our sponsor is Robyn's Fetish and I used one of her gorgeous images. I made a Happy autumn card:
First I coloured in the Fall Pumpkin digital stamp with my copic Ciao markers. Then I fussy cut it out. I took a white card base, inked the edges with Linen Distress Ink. On top I layered burnt orange card, the fall leaf digital paper from a digital scrapbooking kit then some dark brown card that I embossed with a folder and my Cuttlebug. I added a tag I also distressed with the Linen ink. I added jute twine to the tag. A simple yet effective card!
SUPPLIES USED:
Robyn's Fetish Fall Pumpkin digi stamp
Fall Leaf paper from digi kit - "Autumn Thoughts" by Designs by Megan Turnidge
Orange and Brown card from stash
White card base from stash
Copic Ciao markers
Cuttlebug Embossing Folder Argyle
Jute Twine from stash
New Bearly Mine Challenge
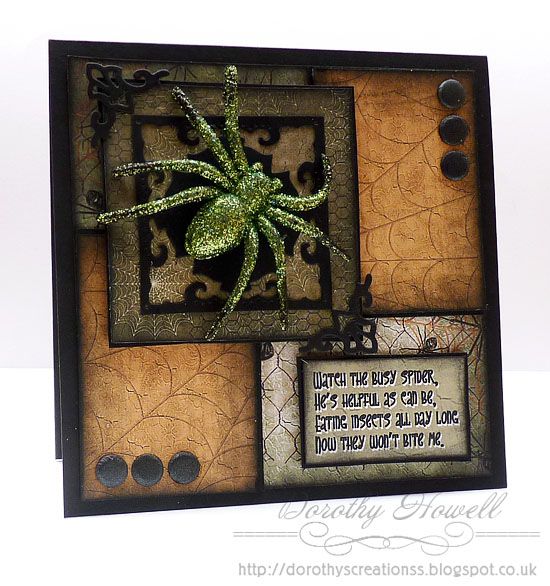
It's a new month so that means it's time for a new challenge at Bearly Mine Challenges! Join us for this month's challenge with the theme halloween. I personally don't "do" halloween so I made a card with a basic theme...SPIDERS...lol.
Whatcha think? Not halloween but still a bit scary huh? Well if you live in the UK you will know we get some really big spiders here, I mean creepy, massively huge, long hairy legged suckers. Don't what it is about the UK that breeds big spiders...lol. Anyway, I used the Bearly Mine paper set called Halloween Fantasy. I used 4 different papers and I colourised 2 of them to match in Photoshop. I edged the papers with Distress Ink in Black Soot. I placed these on a black card base. I embellished with black Card Candi, Spellbinder diecuts and a big green glittered spider I got in a pack of 4 from a local 99p Store.
SUPPLY USED:
Bearly Mine papers - Halloween Fantasy
Black Cardstock - Papermill Direct
Spellbinders - Nestabilities Marvelous Squares S4-383
Craftword Card Candi-Metropolis
Green Glitter Spider - from a local 99p Store
26 September 2014
DSC #107 Music
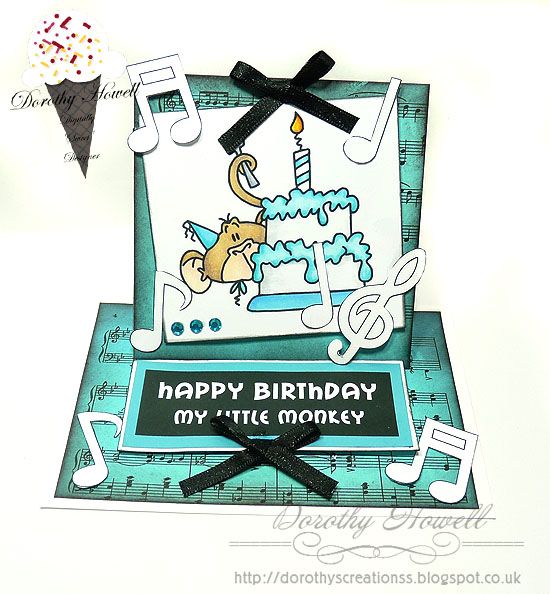
It's another Friday and it's time for the weekly challenge at Digitally Sweet Challenges! Here is my Design Team project for this week...a card:
I made an easel card this time using one of our sponsor's digi stamps. You can find this stamp here at Bugaboo Stamps. I took the stamp and coloured it in with my Copic Ciaos I then printed off a music sheet that I colourised in Photoshop and laid that as a base top and bottom all edges with Black Soot Distress Ink. I also printed out the music notes and fussy cut those out. I made the sentiment myself. Finally added 2 black bows and aqua blue gems.
Yeah I know I know...another BLUE project...lol. I know I've been using a whole lot of blue lately. Sorry about that. I'll make sure to use a diferent colour next time. I hope you enjoyed this week's card and I do hope you will join us for this week's challenge at Digitally Sweet Challenges!
23 September 2014
My Bearly Mine Inspiration Project
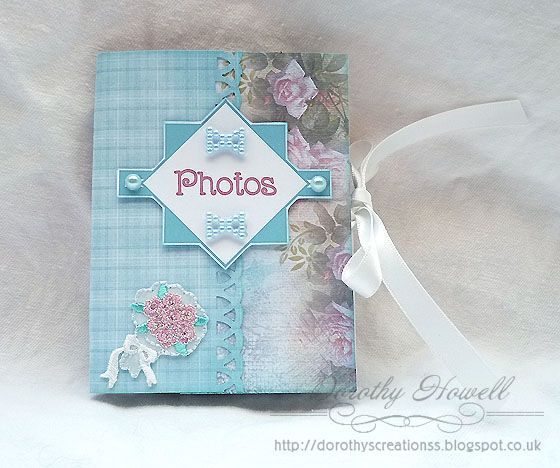
Hello all! As I posted the other day, I am one of the new Design Team gals for Bearly Mine Designs and it's my very first inspiration project using Bearly Mine digital papers. I created a cute little hybrid crafting wedding mini photo folio!
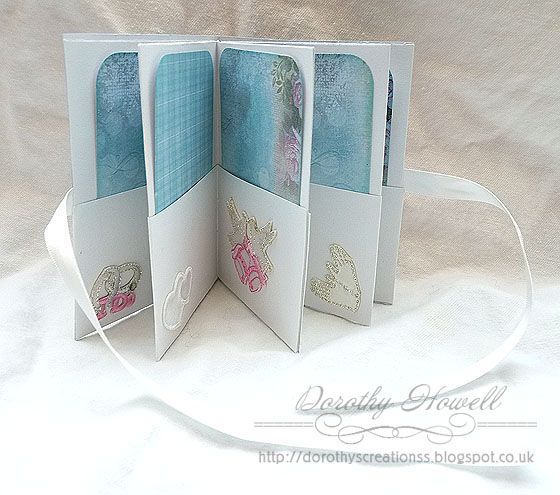
Here is what it looks like inside:
This is sute a cute and quick project to make. I followed a video tutorial by CreationsbyChristie and it uses only one sheet of 12" x 12" cardstock. I used a sheet of textured white card. I took a piece of white ribbon and glued it to the front and back covers. I covered over top the covers with papers I printed from a Bearly Mine Designs paper kit called Summer Floral Delights. I used an edge punch on a 4" x 4" square of the blue pattern to wrap the binding putting that over top a lovely rose print I also printed out eight 2 1/2" x 3 3/4" rectangles of more of the papers to make the photo mats for inside the folio. All the papers were edged in Broken China Distress Ink.
On the cover, I printed out the sentiment I created in Paint Shop Pro to match. Then put that on dimentional foam pads and added some pale blue pearl embellies from my stash. Finally I added these lovely fabric wedding stickers I just bought. They came in a big job lot of stickers I got off of eBay. The album measures 3" x 4" and it was quick and easy to make.
We have a monthly challenge on over at the Bearly Mine Challenge blog, so please check out the current challenge. I sure hope you join us! God bless your today, thank you for having a peek at my blog and, as always...
Happy Crafting!
Dorothy
CHALLENGES ENTERED:
Scribble and Scrap Challenge - Anything Goes
Crafting from the Heart Challenge - Anything Goes
Whoopsi Daisy Challenge - Bling and/or Pearls
Crafty Boots Challenge - Anything Goes
Crafty Cardmakers and more - Ribbon/Lace and Pearls
Inky Chicks Challenge - Anything Goes
Diva by Design Challenge - Anything but a Card
Ruby's Rainbow Challenge - Anything Goes
Crafty Girls Challenge - Anything Goes
Creative Fingers Challenge - Anything Goes
A Creative Romance - Anything Goes
21 September 2014
New Design Team Member!
Yep, I did it again! I am now a new member of a Design Team. I am one of the new dsigners for Bearly Mine Designs! I get to work with their absolutely gorgeous digital paper designs and I'm so excited. You can join us on the Bearly Mine Challenge Blog as well to see gorgeous inspiration projects and enter into challenges to win great products too! Keep an eye out tomorrow when I show off an inspirational crafty project using Bearly Mine papers.
I want to also thank everyone at Bearly Mine for choosing me to be a part of the team...they are such a talented group of carfters and designers, I hope I will do you all justice!
19 September 2014
DSC #106 Rock It Out
Welcome to today's post everyone! It's Friday and you know what that means...time to show you this week's challenge and DT project for Digitally Sweet Challenges! This week's theme is "Rock It Out" and it's open to interpretation. Our lovely sponsor this week is Stitchy Bear Stamps and we had some great images to work with. Here is a digital card front I made for printing:
I used a Coosey Creations kit called "Saxy Frog" to create this digital image. I just love the colours in this kit. the blues and greens are so pretty. I used 3 of the paper designs and the frog digi stamp which I coloured in Photoshop. I overlaid one of the papers over him as well to give him a textured spotty look. The digital ribbons and corners were from my digi stash and I made the sentiment myself. The font I used in it is called Howser which you can find here at kevinandamanda.com.
I hope you all will join us over at Digitall Sweet Challenges this week and join in the fun! Have a terrific weekend too. God bless!
Happy Crafting, Dorothy
17 September 2014
My 1st DT Project for Crafty Creations!
Hi everyone..it's time for my very first Design Team project for Crafty Creations Challenges! I do hope you will join us for this fortnight's challenge and the theme is VINTAGE! So come and show us your Vintage-ness...lol. Our sponsor for this challege is Whiff of Joy Stamps and they are offering an adorable Christmas mouse rubber stamp to the winner. Go HERE for more on this challege.
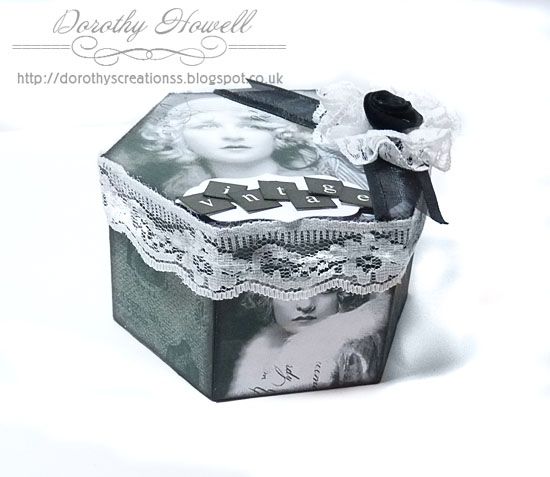
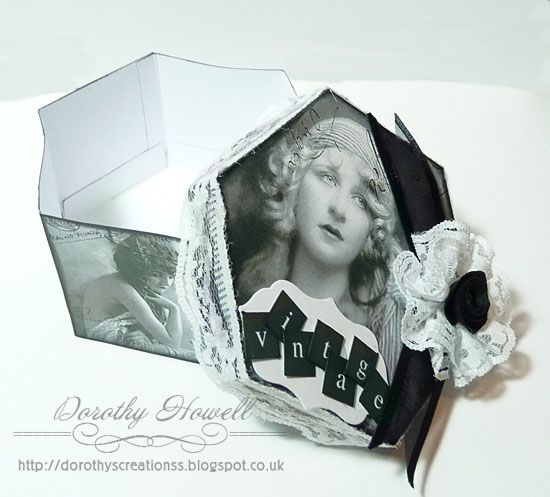
Here is my project...a sweet vintage box:
Ain 't it cute? LOL This is a vintage digital project, you know how I love doing digital. I started off with a template I downloaded free from Belle's Printables. I opened it in Photoshop and added a vintage dark digital paper and the free lady images which are from French and Sparrow (lots of gorgeous images there!) I then printed it off, cut it out and glued it together. Then it was a matter of decorating the box with lace, lace flower, felt flower, ribbon and the sentiment. It was simple to make and I hope you will give it a go too!
SUPPLIES USED:
Box Template - Belle's Printables (I used the one called Small Hex Box)
Vintage Ladies - French and Sparrow.com (link goes to the images page)
Sentiment badge - Xcut 5-Piece Large Nesting Dies Doorplate
Lace & Felt flowers were made by me with stash
Ribbon, lace, Vintage letters from my stash.
Hope you will join in the challenge at Crafty Creations! Have a Craft Happy Day!
Hugs, Dorothy
12 September 2014
DSC #105 "Charm"ing
Good morning lovlies! It's dat time...it's time for this week's new challenge at Digitally Sweet Challenges! We have a terrific sponsor this week...you could win your choice of digi stamp from Lacy Sunshine Stamps! She was kind enough to let us on the Design Team have an image each to work with. I chose this beautiful stamp called Emily Snow Princess. Our theme this week is "Charm"ed - Add a charm to your project.
LOL it's hard to see the white card base, this is what happens when I photograph at night. There is just too much glare on the photo. I used an extra light but guess I shouldn't have...can we say "overkill?" LOL This is an extra large card. It measures 6 3/4" by 6 3/4" which I made out of A3 white cardstock. I printed out the digi stamp and the 4 digital papers and sentiment. These were from a freebie scrap kit I had downloaded awhile back. I coloured Emily with my Copics, then added corner dots, a ribbon and a charm which is metal with a heart on it.I definitely didn't use traditional Christmas colours on this one but I went with the colours of the scrap kit I used. All supplies are listed below.
SUPPLIES USED:
Emily Snow Princess Digital Stamp - Lacy Sunshine Stamps
Creativ Christmas Free Digi Scrap Kit - Regina Falango (kit no longer available but she has other freebies)
A3 Cardstock Base - Papermill Direct
Copic Markers
Card Candi
Green Cardstock - Core'dinations Gemstone Cardstock 12"X12"
Thanks for having a peek...hope you will join us at Digitally Sweet Challenges. We would love to see your creations!
Happy Crafting!
Dorothy
11 September 2014
New DESIGN TEAM Member Here!
I really enjoy being a Design Team member. I'm not very confident in my crafting so when I applied for my first DT position and got it, well I was chuffed. Welllll, I applied to another DT and I am again proud to say I was accepted!
I am one of the newest Design Team members at...
I am one of the newest Design Team members at...
Crafty Creations Challenges has a new challenge every other Wednesday. The current challenge is now on and you can check it out HERE. You could win your choice of 3 digi stamps from Stitchy Bear Designs!
I'd like to say a big thank you to everyone at Crafty Creations for choosing me and I will do my creative best!
Thanks for reading...Happy Crafting!
Dorothy
Subscribe to:
Posts (Atom)


