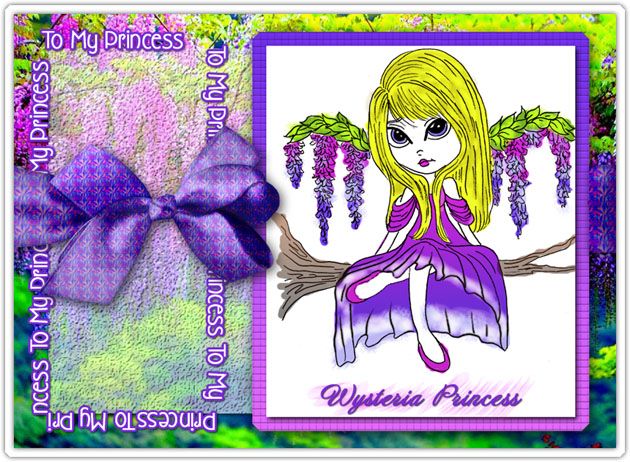
Welcome to your weekly challenge over at Digitally Sweet Challenges! I'm a Design Team member and tis week we made projects for our theme "Font Talk" which mean to show off your use of different fonts. Our lovely sponsor is Lacy Sunshine Stamps and we were each allowed to use one of her designs...I chose to do a digital image with this beautiful Wisteria Etherial Enchantress:
I have fond memories of a huge wisteria that grew in my side yard growing up in New Jersey. My sisters and I used to play underneath it in the summer as it was hollow under all the leaves and blooms. It was cool under there and it was like being in a fragrant cave. It smelled soooo lovely. Only down fall was fighting all the bees to get inside...lol.
I sure hope you will join us over at Digitally Sweet. You will have the whole month of March to enter this challenge...ain't that cool? Can't wait to see what you create showing off your favourite fonts!
Showing posts with label Digital Stamps. Show all posts
06 March 2015
12 September 2014
DSC #105 "Charm"ing
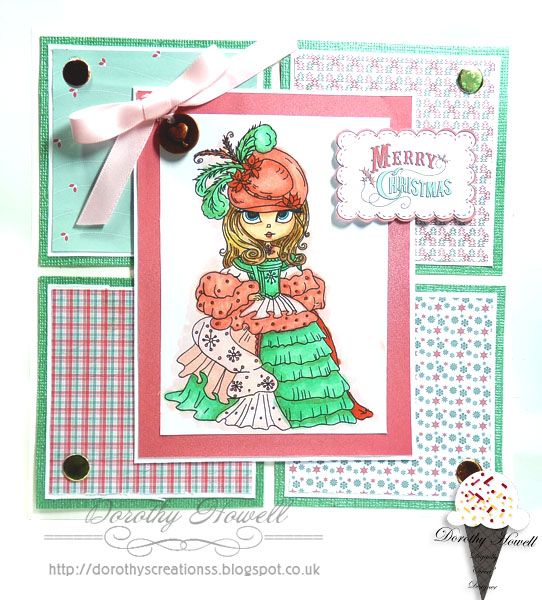
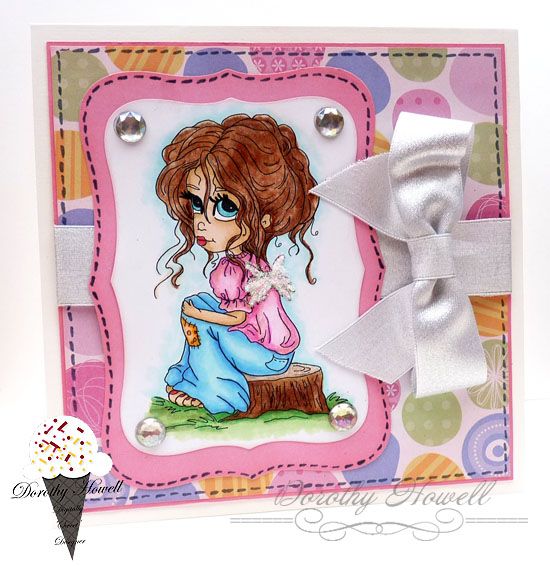
Good morning lovlies! It's dat time...it's time for this week's new challenge at Digitally Sweet Challenges! We have a terrific sponsor this week...you could win your choice of digi stamp from Lacy Sunshine Stamps! She was kind enough to let us on the Design Team have an image each to work with. I chose this beautiful stamp called Emily Snow Princess. Our theme this week is "Charm"ed - Add a charm to your project.
LOL it's hard to see the white card base, this is what happens when I photograph at night. There is just too much glare on the photo. I used an extra light but guess I shouldn't have...can we say "overkill?" LOL This is an extra large card. It measures 6 3/4" by 6 3/4" which I made out of A3 white cardstock. I printed out the digi stamp and the 4 digital papers and sentiment. These were from a freebie scrap kit I had downloaded awhile back. I coloured Emily with my Copics, then added corner dots, a ribbon and a charm which is metal with a heart on it.I definitely didn't use traditional Christmas colours on this one but I went with the colours of the scrap kit I used. All supplies are listed below.
SUPPLIES USED:
Emily Snow Princess Digital Stamp - Lacy Sunshine Stamps
Creativ Christmas Free Digi Scrap Kit - Regina Falango (kit no longer available but she has other freebies)
A3 Cardstock Base - Papermill Direct
Copic Markers
Card Candi
Green Cardstock - Core'dinations Gemstone Cardstock 12"X12"
Thanks for having a peek...hope you will join us at Digitally Sweet Challenges. We would love to see your creations!
Happy Crafting!
Dorothy
LOL it's hard to see the white card base, this is what happens when I photograph at night. There is just too much glare on the photo. I used an extra light but guess I shouldn't have...can we say "overkill?" LOL This is an extra large card. It measures 6 3/4" by 6 3/4" which I made out of A3 white cardstock. I printed out the digi stamp and the 4 digital papers and sentiment. These were from a freebie scrap kit I had downloaded awhile back. I coloured Emily with my Copics, then added corner dots, a ribbon and a charm which is metal with a heart on it.I definitely didn't use traditional Christmas colours on this one but I went with the colours of the scrap kit I used. All supplies are listed below.
SUPPLIES USED:
Emily Snow Princess Digital Stamp - Lacy Sunshine Stamps
Creativ Christmas Free Digi Scrap Kit - Regina Falango (kit no longer available but she has other freebies)
A3 Cardstock Base - Papermill Direct
Copic Markers
Card Candi
Green Cardstock - Core'dinations Gemstone Cardstock 12"X12"
Thanks for having a peek...hope you will join us at Digitally Sweet Challenges. We would love to see your creations!
Happy Crafting!
Dorothy
22 August 2014
DSC #102 Guys Only
Welcome to another DT project for Digitally Sweet Challenges! Our theme this week is GUYS ONLY and we had some wonderful images to choose from given graciously for this week's sponsor Stitchy Bear Stamps. I made a masculine birthday card:
I printed out the lighthouse beach digital stamp and one of the digital papers by Stitchy Bear and added to back card base. I coloured the digi stamp with my watercolour pencils and a water brush. I then used a die for the sides and corners in black and buff cardstock. This is the first time I've used this Spellbinders Marvelous Squares die too! I've had it in my stash waaaaay too long LOL. The sentiment is hand stamped and I added a dark beige ribbon that matched the buff card. I do make simpler style cards and I really wanted simple with this one as the image is so great. I wanted it to be the focus of the card. Hope you like it!
SUPPLIES USED:
Sunset at Sea digi stamp & backing paper - Stitchy Bear Stamps
Corner and border side diecuts - Spellbinder Die set called Marvelous Squares
Sentiment Stamp - Papermania Clare Curd's Signature Range (Sentiments)
Derwent Waltercolour Pencils
Dovecraft Premium Pigment Ink in black
Black and Buff cardstock - Papermill Direct
Ribbon from my stash
CHALLENGES ENTERED:
Papertake Weekly - To Die For (use a diecut)
Sweet Stamps - Anything Goes
Try It On Tuesday - Use your stash (ribbon and die)
Crafty Creations Challenges - Use Something Old from Stash (ribbon & Die)
Crafty Girlz Challenges - Anything Goes
Crafts 4 Eternity Challenge - Beside the Seaside
Creative Fingers Challenges - anything Goes
Suzy Bee's Bloomin Challenge - Anything Goes
Eclectic Ellapu - Seaside/Nautical and Anything Goes with Watercolours
Little Claire's Design challenges - Man's Birthday Card
I printed out the lighthouse beach digital stamp and one of the digital papers by Stitchy Bear and added to back card base. I coloured the digi stamp with my watercolour pencils and a water brush. I then used a die for the sides and corners in black and buff cardstock. This is the first time I've used this Spellbinders Marvelous Squares die too! I've had it in my stash waaaaay too long LOL. The sentiment is hand stamped and I added a dark beige ribbon that matched the buff card. I do make simpler style cards and I really wanted simple with this one as the image is so great. I wanted it to be the focus of the card. Hope you like it!
SUPPLIES USED:
Sunset at Sea digi stamp & backing paper - Stitchy Bear Stamps
Corner and border side diecuts - Spellbinder Die set called Marvelous Squares
Sentiment Stamp - Papermania Clare Curd's Signature Range (Sentiments)
Derwent Waltercolour Pencils
Dovecraft Premium Pigment Ink in black
Black and Buff cardstock - Papermill Direct
Ribbon from my stash
CHALLENGES ENTERED:
Papertake Weekly - To Die For (use a diecut)
Sweet Stamps - Anything Goes
Try It On Tuesday - Use your stash (ribbon and die)
Crafty Creations Challenges - Use Something Old from Stash (ribbon & Die)
Crafty Girlz Challenges - Anything Goes
Crafts 4 Eternity Challenge - Beside the Seaside
Creative Fingers Challenges - anything Goes
Suzy Bee's Bloomin Challenge - Anything Goes
Eclectic Ellapu - Seaside/Nautical and Anything Goes with Watercolours
Little Claire's Design challenges - Man's Birthday Card
15 August 2014
DSC #101 Recipe Challenge
Welcome to another Friday Design Team creations for the wonderful challenges at Digitally Sweet Challenges! Our fab sponsor this week is Sparkle n Sprinkle. They are offering a terrific prize for this week's winner! Our theme this week is a Recipe challenge: Use 1 image...2 designer papers [digital or real], 3 different embellies [digital or real]. Here's mine:
I used 1 image (just used it 5 times...lol,) 2 digital papers (one for bg and one used behind digital stamp), and 3 real embellishments (blue ribbon, red flat backed pearls and a frame I made. I know these colours are a bit unusual. I took it from the plaid digital paper I created for a digi scrap kit for a collab when I sold at a shop called Designs In Digital. I took the digi stamp and removed the white bg in Photoshop then added a matching digital paper in gold behind it and colourised the stamp in navy blue. Luckily I had some DCWV matching cardstock in a rustic red for the mats on the stamps, frame and punched border. Just added a gold card base and gold mirri frame layer.
SUPPLIES USED:
Pinecone & Needles Digi Stamp - Sparkle n Sprinkle (link goes directly to digi stamp page)
Digital papers - Designed by me
Red cardstock - DCWV Matchmakers Cardstock Stack in Neutrals
Gold card base and Gold mirri board - from stash
Border Punch - Martha Stewart Punch Around the Page Modern Garland (old one, used border)
Red flat backed pearls - MeiFlowers
Blue Ribbon - Ribbon Oasis
Antique Linen Distress Ink
CHALLENGES ENTERED:
Crafting When We Can - Bright Colours
That Craft Place Challenge - Autumn or Steampunk
The Squirrel and Fox - Anything Goes
Penny's Paper Crafty Challenge - anything Goes
Crafty Girls Challenge - Anything Goes
Creative Fingers Challenge - Anything Goes
Suzy Bee's Bloomin' Challenge - Anything Goes
I used 1 image (just used it 5 times...lol,) 2 digital papers (one for bg and one used behind digital stamp), and 3 real embellishments (blue ribbon, red flat backed pearls and a frame I made. I know these colours are a bit unusual. I took it from the plaid digital paper I created for a digi scrap kit for a collab when I sold at a shop called Designs In Digital. I took the digi stamp and removed the white bg in Photoshop then added a matching digital paper in gold behind it and colourised the stamp in navy blue. Luckily I had some DCWV matching cardstock in a rustic red for the mats on the stamps, frame and punched border. Just added a gold card base and gold mirri frame layer.
SUPPLIES USED:
Pinecone & Needles Digi Stamp - Sparkle n Sprinkle (link goes directly to digi stamp page)
Digital papers - Designed by me
Red cardstock - DCWV Matchmakers Cardstock Stack in Neutrals
Gold card base and Gold mirri board - from stash
Border Punch - Martha Stewart Punch Around the Page Modern Garland (old one, used border)
Red flat backed pearls - MeiFlowers
Blue Ribbon - Ribbon Oasis
Antique Linen Distress Ink
CHALLENGES ENTERED:
Crafting When We Can - Bright Colours
That Craft Place Challenge - Autumn or Steampunk
The Squirrel and Fox - Anything Goes
Penny's Paper Crafty Challenge - anything Goes
Crafty Girls Challenge - Anything Goes
Creative Fingers Challenge - Anything Goes
Suzy Bee's Bloomin' Challenge - Anything Goes
01 August 2014
DSC #99 - Favourite Colours
Sorry I'm late with today's post but I innocently went out with my hubby to pick up some orange juice...well we did end up with orange juice but we also bought a new dining room set! Expensive orange juice...lol.
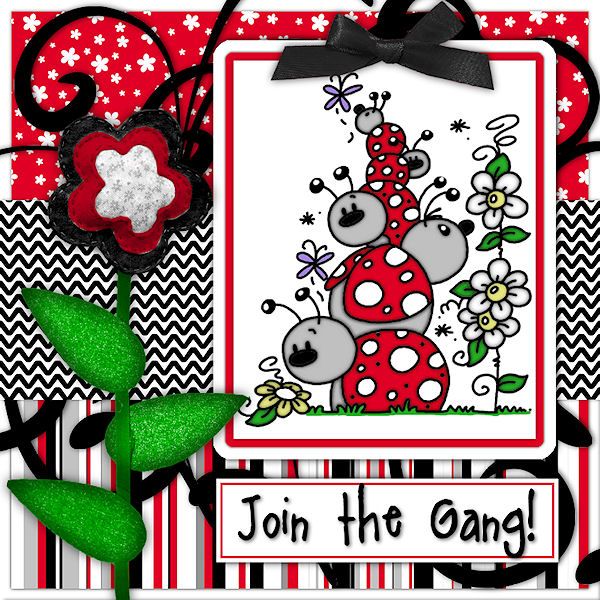
This week's theme for our challenge at Digitally Sweet Challenges is favourite colour and out lovely sponsor was Bugaboo Stamps. Red is my fave specially when it's paired up with black, white or grey..or all of them together...lol.
I created this using Paint Shop Pro VII by using digital papers created by me and some digi scrappy goodies. The font I used is called A Little Pot and you can find it at Kevinandamanda.com (about halfway down page.)
25 July 2014
DSC #98 - Embellish It Up!
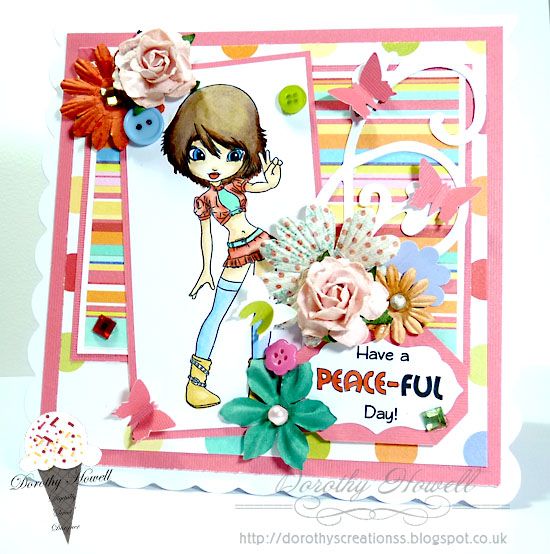
Welcome to Friday here on my blog. It's time for a new challenge at Digitally Sweet Challenges and our theme this week is Embellish It Up. IT leaves alot up to you in its interpretation but I think it means lots of embellishments on your project. Our wonderful sponsor this week is Stitchy Bear Stamp Outlet and they provided some lovely images to play with. I chose a cute little digi girl.
Sorry for the awful photo. It was late when I too the photo and I had to use 2 lights on it but I think there was too much light and it's a bit overexposed. Ah well...I never claimed to be a professional...lol. The card is actually a lovely coral colour but it looks too washed out above. You can check out my supplies list below. Most of the embellies are from my stash though. I hope you will join us over at Digitally Sweet and join in the Challenge. You could win some very cool images!
SUPPLIES USED:
Emolie Peace digi stamp - Stitchy Bear Stamp Outlet (link takes you to Emolie stamp page)
Papers & Coloured card - old DCWV 8" x 8" Scrapbook Kit in a Stack pad Birthday
Butterfly punch - Xcut Butterfly Punch
Prima Flowers
Light Pink Roses - Wild Orchid Crafts
Copic Ciao Markers
Sentiment made by me in Paint Shop Pro
White Scalloped Blank Card, Buttons, Flat backed Gems, Pearls - from my stash
Sorry for the awful photo. It was late when I too the photo and I had to use 2 lights on it but I think there was too much light and it's a bit overexposed. Ah well...I never claimed to be a professional...lol. The card is actually a lovely coral colour but it looks too washed out above. You can check out my supplies list below. Most of the embellies are from my stash though. I hope you will join us over at Digitally Sweet and join in the Challenge. You could win some very cool images!
SUPPLIES USED:
Emolie Peace digi stamp - Stitchy Bear Stamp Outlet (link takes you to Emolie stamp page)
Papers & Coloured card - old DCWV 8" x 8" Scrapbook Kit in a Stack pad Birthday
Butterfly punch - Xcut Butterfly Punch
Prima Flowers
Light Pink Roses - Wild Orchid Crafts
Copic Ciao Markers
Sentiment made by me in Paint Shop Pro
White Scalloped Blank Card, Buttons, Flat backed Gems, Pearls - from my stash
18 July 2014
DSC #97 - Orange Shades
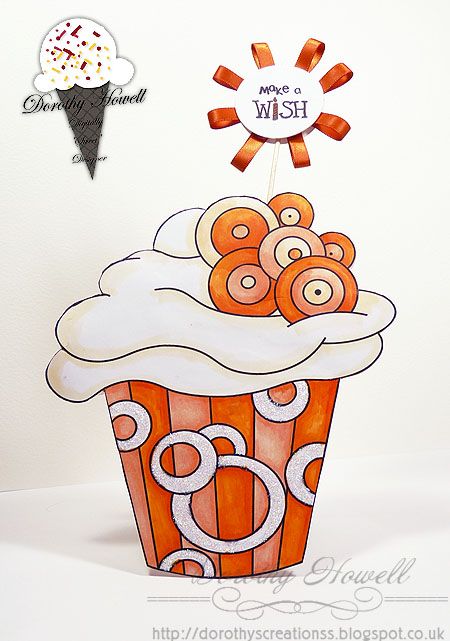
H there...it's Friday and time for a new Digitally Sweet Challenge this week! The DT's mission, if we chose to accept it, was to create with shades of ORANGE. Our sponsor, Limited Runs Stamps, gave use our choice of image to play with and this week I chose a fun Retro Cupcake:
I made this cupcake shaped card for this week's challenge. I resized the cupcake to approximately 15 cm x 15 cm, it's actually a little taller than 15 cm. I printed it off on thin cardstock and cut it out with scissors. I then traced it twice on 300 gsm white card and cut those out as well. I coloured in the cupcake using my trusty ole Copic Ciao markers. On the circles at the bottom of the cupcake wrapper, I used a new product I got the other week. It's from Imagination Crafts and it's called Detail Sparkle in White Shimmer (link to product below in Supplies List.) It's kind of like Stickles but I like it so much better and I'll tell ya why...the glitter is finer, it flows better, the bottle is a bit bigger, AND best of all, it has a very long, thin nozzle with an attached cap. The nozzle is awesome on it and I liked how it flows as well. Defintely check them out!
I glued the printed out cupcake onto one of the thick card ones. On the other plain cupcake, I made a score line across the top so it would fold out the back once glued onto the top edge of the printed out one. While assembling I added a toothpick out the top, it's glued between the front and back of the card. Then I punched 2 circles, stamped a sentiment on one and sandwiched orange ribbon loops between them. I then stuck that on the toothpick. So easy to do.
SUPPLIES LIST:
Retro Cupcake Digi Stamp - Limited Runs Stamps (link goes to stamp's page)
White 300 gsm Card - Paper Mill Direct
White Shimmer Detail Sparkle - Imagination Crafts (link goes right to product page)
Orange Satin Ribbon - Ribbon Oasis
Sentiment Stamp - studio g+ mini stamp set (birthday)
Copic Ciao Markers
Black pigment ink
1.5 inch circle punch
Toothpick
Tacky Glue
I made this cupcake shaped card for this week's challenge. I resized the cupcake to approximately 15 cm x 15 cm, it's actually a little taller than 15 cm. I printed it off on thin cardstock and cut it out with scissors. I then traced it twice on 300 gsm white card and cut those out as well. I coloured in the cupcake using my trusty ole Copic Ciao markers. On the circles at the bottom of the cupcake wrapper, I used a new product I got the other week. It's from Imagination Crafts and it's called Detail Sparkle in White Shimmer (link to product below in Supplies List.) It's kind of like Stickles but I like it so much better and I'll tell ya why...the glitter is finer, it flows better, the bottle is a bit bigger, AND best of all, it has a very long, thin nozzle with an attached cap. The nozzle is awesome on it and I liked how it flows as well. Defintely check them out!
I glued the printed out cupcake onto one of the thick card ones. On the other plain cupcake, I made a score line across the top so it would fold out the back once glued onto the top edge of the printed out one. While assembling I added a toothpick out the top, it's glued between the front and back of the card. Then I punched 2 circles, stamped a sentiment on one and sandwiched orange ribbon loops between them. I then stuck that on the toothpick. So easy to do.
SUPPLIES LIST:
Retro Cupcake Digi Stamp - Limited Runs Stamps (link goes to stamp's page)
White 300 gsm Card - Paper Mill Direct
White Shimmer Detail Sparkle - Imagination Crafts (link goes right to product page)
Orange Satin Ribbon - Ribbon Oasis
Sentiment Stamp - studio g+ mini stamp set (birthday)
Copic Ciao Markers
Black pigment ink
1.5 inch circle punch
Toothpick
Tacky Glue
27 June 2014
DSC #94 - Inpired by a Book
Howdy folks! It's Friday and it's time for our weekly challenge at Digitally Sweet Challenges! Out DT theme for this week is: Inspired by a Book. We got to chose a stamp to work with from our sponsor Bugaboo Stamps and you just KNOW I had to choose this one:
Wizard of OZ.
I made an easel card this week. Who doesn't love those?? I started with the Dottie Dorothy stamp from Bugaboo Stamps, printed it off 3 times and cut it out in different parts so I could create it in 3D decoupage. I used Promarkers to colour Dorothy and Toto. You can kinda see the shadows on her. I also printed off an image I found of the Emerald City off a Google search. I altered it a little in Photoshop by extending the grass and yellow brick road. The grass paper is an ancient paper I found stuck in my paper drawer. My sister, Cris, bought a pack of scrapbook paper for my daughter almost 9 yrs ago and I ended up with it. This grass paper was one of those. I though it would go alright. I created the sentiment myself all matted on green and yellow thick paper. I accented the Emerald City with Pearl Accents and made a pink poppy fiels with glue and 2 shades of pink glitter. I might go back and add a little something to the bottom corner like some pink flowers or something. I'll have a think about it...lol.
SUPPLIES USED:
Dottie Dorothy Digi Stamp - Bugaboo Stamps (link goes directly to digi stamp page)
Promarkers
Emerald City Image - off Internet
Pearl Accents
White Cardstock base - Papermill Direct
Grass paper, yellow paper, green paper, pink glitter - from my stash
Tacky Glue, Pinflair Gel Glue (for doing 3D decoupage) and foam tape (for sentiment)
Wizard of OZ.
I made an easel card this week. Who doesn't love those?? I started with the Dottie Dorothy stamp from Bugaboo Stamps, printed it off 3 times and cut it out in different parts so I could create it in 3D decoupage. I used Promarkers to colour Dorothy and Toto. You can kinda see the shadows on her. I also printed off an image I found of the Emerald City off a Google search. I altered it a little in Photoshop by extending the grass and yellow brick road. The grass paper is an ancient paper I found stuck in my paper drawer. My sister, Cris, bought a pack of scrapbook paper for my daughter almost 9 yrs ago and I ended up with it. This grass paper was one of those. I though it would go alright. I created the sentiment myself all matted on green and yellow thick paper. I accented the Emerald City with Pearl Accents and made a pink poppy fiels with glue and 2 shades of pink glitter. I might go back and add a little something to the bottom corner like some pink flowers or something. I'll have a think about it...lol.
SUPPLIES USED:
Dottie Dorothy Digi Stamp - Bugaboo Stamps (link goes directly to digi stamp page)
Promarkers
Emerald City Image - off Internet
Pearl Accents
White Cardstock base - Papermill Direct
Grass paper, yellow paper, green paper, pink glitter - from my stash
Tacky Glue, Pinflair Gel Glue (for doing 3D decoupage) and foam tape (for sentiment)
20 June 2014
DSC #93 - Transport
Here I am with another lovely DT project for Digitally Sweet Challenges! Our sponsor this week is Stitchy Bear Stamps and out of the wonderful images we were given to work with, I chose this little Train Engineer digi stamp and blue plaid paper.
SUPPLIES USED:
Trainspotting Digi Stamp, Blue plaid paper, green texture paper - Stitchy Bear Stamps
Stripe and dark blue Washi Tape - Papermania
Green Chevron Washi Tape - bought on Ebay
Black cardstock and buttons - from stash
White cardstock base
CHALLENGES ENTERED:
One Stitch at a Time Challenge - Button It
I didn't get much craft room time this week as I had lots of work to finish at my "real" job and since I work from home..you know how that goes. I coloured in this little fellow with my Copic Ciao markers and mounted him on black card and green paper I printed from Stitchy Bear. I also printed out the sentiment and mounted that on the same. The blue plaid paper was printed out as well. The area behind the sentiment is a piece of white card covered in 3 different washi tapes, lastly I added a couple of buttons from my stash.
Trainspotting Digi Stamp, Blue plaid paper, green texture paper - Stitchy Bear Stamps
Stripe and dark blue Washi Tape - Papermania
Green Chevron Washi Tape - bought on Ebay
Black cardstock and buttons - from stash
White cardstock base
CHALLENGES ENTERED:
One Stitch at a Time Challenge - Button It
13 June 2014
DSC #92 - Holidays/Vacation
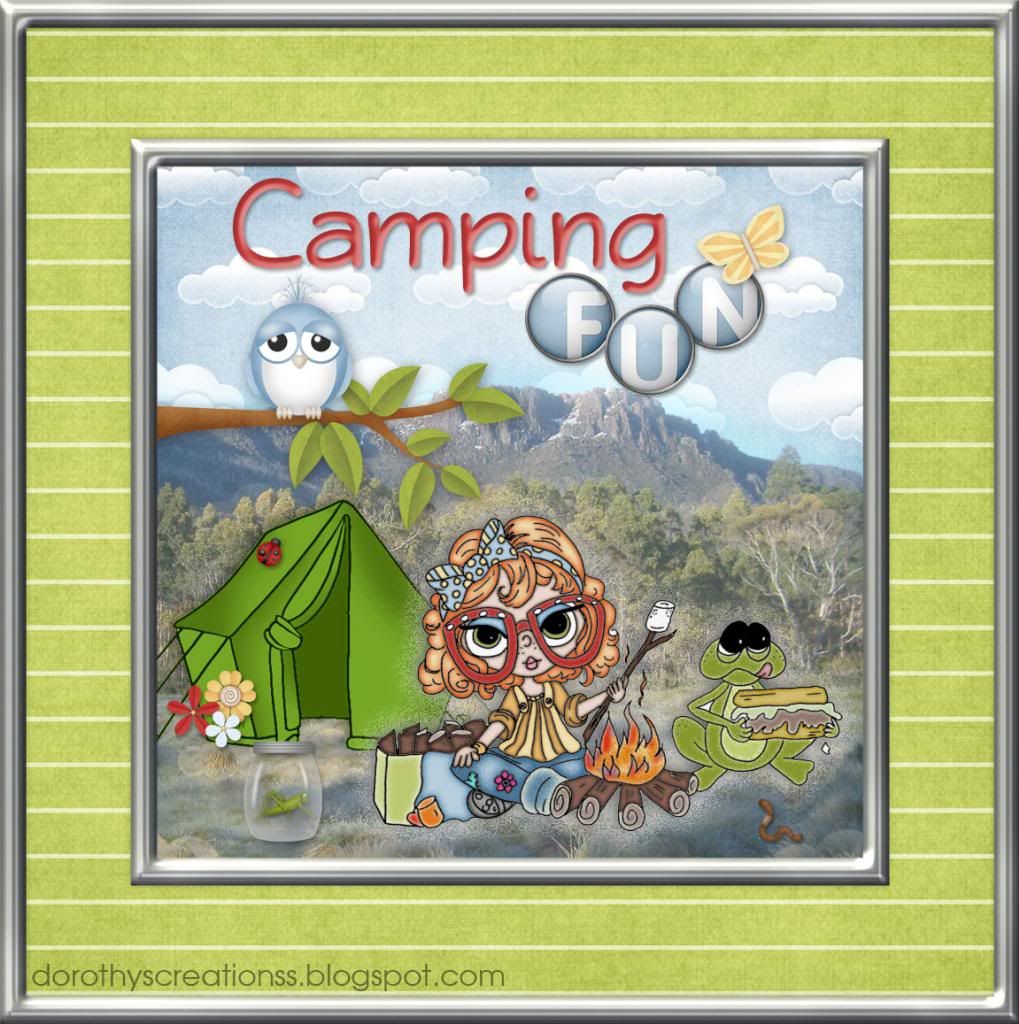
Yep, it's Friday and I'm here with my DT project for this week over at Digitally Sweet Challenges. Our theme was Holidays (UK) or Vacations (US) and we got to choose our own image to work with from our terrific sponsor, Lacy Sunshine Stamps! I've done another digital image this week as my craft room is a bit torn apart. More on that later.
This was completely done in Photoshop. I coloured in the digital image in a couple different ways each section on its own layer. Then to each layer I added an Inner Glow with a little bit of Noise. The colours I used came from the digital scrapbooking kit I used. I found a free clip art image of a tent. The background is a mountain image that I layered over papers from the kit. One paper was a gree/blue gradient then I added the cloud paper underneath and played with the Layer Properties so they blended well. The wording at the top eas done using an alpha that came with the scrap kit for the word "fun." I used the font Qarmic Sans for the word "camping." Al the other bits in the image and the frame are from the scrap kit.
A little about the scrap kit: I have been collecting freebie digital scrap kits since 2007 so you can image how many I have collected over the years. Funny thing is I couldn't find a camping kit so I improvised with this kit. It's no longer available so please do not ask me where it is. What I can tell you is it's called "Discovery" and its designed by Kim Cameron over at Daisies and Dimples. This freebie is a few years old and she has since closed her personal blog...sorry about that dearies.
My poor craft room is a bit blocked off at the moment as we had a water leak in our house. This has been going on awhile and the water company FINALLY came and rerouted the main supply but the pipe had to come in through half of my craft room. It's done now so I hope to be back in there this weekend! Hope so as I have a swap due and I want to do a video of my project. YIKES!
SUPPLIES USED:
Eleanor and Pickles Smores Digi Stamp - Lacy Sunshine Stamps
Free Stock Mountain Image - Photo Everywhere
Free Tent Clipart - Clipart Best
Digital Scrap Kit "Discovery" - Kim Cameron
Font Used "Qarmic Sans" - Font Squirrel
(Click on image to see full size view)
This was completely done in Photoshop. I coloured in the digital image in a couple different ways each section on its own layer. Then to each layer I added an Inner Glow with a little bit of Noise. The colours I used came from the digital scrapbooking kit I used. I found a free clip art image of a tent. The background is a mountain image that I layered over papers from the kit. One paper was a gree/blue gradient then I added the cloud paper underneath and played with the Layer Properties so they blended well. The wording at the top eas done using an alpha that came with the scrap kit for the word "fun." I used the font Qarmic Sans for the word "camping." Al the other bits in the image and the frame are from the scrap kit.
A little about the scrap kit: I have been collecting freebie digital scrap kits since 2007 so you can image how many I have collected over the years. Funny thing is I couldn't find a camping kit so I improvised with this kit. It's no longer available so please do not ask me where it is. What I can tell you is it's called "Discovery" and its designed by Kim Cameron over at Daisies and Dimples. This freebie is a few years old and she has since closed her personal blog...sorry about that dearies.
My poor craft room is a bit blocked off at the moment as we had a water leak in our house. This has been going on awhile and the water company FINALLY came and rerouted the main supply but the pipe had to come in through half of my craft room. It's done now so I hope to be back in there this weekend! Hope so as I have a swap due and I want to do a video of my project. YIKES!
SUPPLIES USED:
Eleanor and Pickles Smores Digi Stamp - Lacy Sunshine Stamps
Free Stock Mountain Image - Photo Everywhere
Free Tent Clipart - Clipart Best
Digital Scrap Kit "Discovery" - Kim Cameron
Font Used "Qarmic Sans" - Font Squirrel
31 May 2014
DSC #90 - Friendship
Happy Friday one and all! Here I am with my DT project for this week's challenge at Digitally Sweet Challenges. Our theme this week is FRIENDSHIP and our lovely sponsor is Sparkle & Sprinkle. For today's project I made a card of course...lol. This one was fun:
I enjoyed making this card because as soon as I saw this image, this card popped into my head. I wanted to use lots of bright colours so out came the Copic Ciao markers and away I went. The base is a scalloped edge white card, the flowers are old Prima Flowers I ordered off of QVC many moons ago. Final touch was adding the little shells. Hope you like it too!
SUPPLIES USED:
BFF Mermaid digital stamp - Sparkle & Sprinkle (link takes you right to the stamp's page)
Copic Ciao Markers
White Scalloped 6" x 6" blank card - From stash
Aqua cardstock & blue dotted cardstock - From stash
Prima Flowers - in tubes from stash
Green, Pink and Orange Trims - Bazzil Basic Cardstock Borders
Shells - From stash
Big flatback pearls, small pearls and Card Candi flower centres - From stash
I enjoyed making this card because as soon as I saw this image, this card popped into my head. I wanted to use lots of bright colours so out came the Copic Ciao markers and away I went. The base is a scalloped edge white card, the flowers are old Prima Flowers I ordered off of QVC many moons ago. Final touch was adding the little shells. Hope you like it too!
SUPPLIES USED:
BFF Mermaid digital stamp - Sparkle & Sprinkle (link takes you right to the stamp's page)
Copic Ciao Markers
White Scalloped 6" x 6" blank card - From stash
Aqua cardstock & blue dotted cardstock - From stash
Prima Flowers - in tubes from stash
Green, Pink and Orange Trims - Bazzil Basic Cardstock Borders
Shells - From stash
Big flatback pearls, small pearls and Card Candi flower centres - From stash
26 May 2014
DSC #89 Babies
Well it's official! My Scheduling function on Blogger is not working. I
had this post set for Friday morning, but just noticed that it hadn't
posted. My HUGE apologies to Digitally Sweet Challenge for my DT project
not to be there.
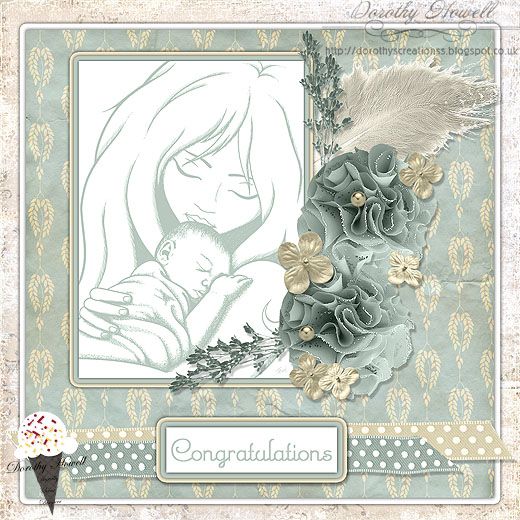
Welcome to another DT project for this week's challenge at Digitally Sweet challenges! We love digital over at Digitally Sweet so this week I created an all digi image using one of our sponsor's images from Stitchy Bear Stamps:
I created this image in Photoshop to use basically as a printable card topper. Our theme is "Babies" so I made it as a baby shower type card. I went through my Commercial Use digital scrapbooking folders and found elements to put with the Stitchy Bear stamp. The backing papers are from Far Far Hill.
Welcome to another DT project for this week's challenge at Digitally Sweet challenges! We love digital over at Digitally Sweet so this week I created an all digi image using one of our sponsor's images from Stitchy Bear Stamps:
I created this image in Photoshop to use basically as a printable card topper. Our theme is "Babies" so I made it as a baby shower type card. I went through my Commercial Use digital scrapbooking folders and found elements to put with the Stitchy Bear stamp. The backing papers are from Far Far Hill.
16 May 2014
DSC # 88 Blue & Yellow
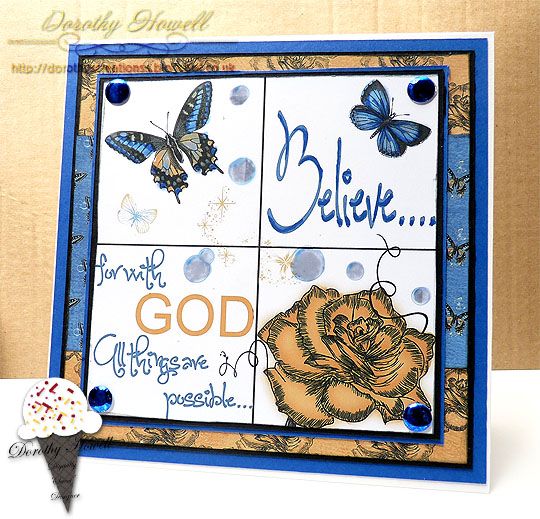
Happy Friday ya'll! That's my Southern coming out in me today...lol. So it's Friday and ya'll know what that means...it's time to show you my Design Team project for Digitally Sweet Challenges! This week's theme for you is Blue & Yellow and the sponsor is Bugaboo Stamps. We got to choose our own image and here's my project:
I made a card this week. I know it's a pretty basic design but I did alot of colourising in Photoshop and with Copics. The whole digi stamp was in black and white but I changed the colour of the text and digitally painted the rose and butterflies. I then used the rose and big butterfly to create matching papers that I printed out as well. I then just edged the papers and stamp with Black Soot Distress Ink and did lots of matting and layers in black and royal blue card. I used a Copic marker to change the colour of the Card Candy and added to the corners. My final touch was a bit of a fail that looks a little better in person is I added Pinflair Glaze to the bubbles in the digi stamp. The glaze absorbed into the paper too much and stained but it is really glossy when you see it live. Ah well.
One thing I am loving and that's my Perfect Layers rulers to created nice even layers. I got the full sized ones so I could use them on bigger projects as well as cards. LOVE LOVE LOVE! Get yourself some if you are "straight line challenged" like me...lol. I can't cut a straight line to save my life, even with a paper trimmer...even with a guillotine! Someone at one time must have told me to "get bent" and boy I sure did...LOLOLOL.
SUPPLIES USED:
Bugaboo Stamps - Image name 4 square Beleive (link goes right to image I used)
Blue Cardstock - From stash
Black Cardstock - 12" x 12" from Papermill Direct
Backing papers - created by me in PS CS3 using the digistamp
Copic Ciao Markers - B29 Ultramarine, B24 Sky, YR23 Yellow Ochre & YR17 Golden Yellow
Craftworks Card Candi - in silver
Pinflair Craft Glaze
Distress Ink - Black Soot
CHALLENGES ENTERED:
Dream Valley Challenges - Anything Goes
Scribble and Scrap Challenge - Anything Goes
Through the Purple Haze - Anything Goes for a Male
Crafty Boots Challenge - Blue & White
Ooh La La Creations Challenge - Quotations
Just Inspirational Challenges - Anything Goes
Crafting for All Seasons - Things with Wings
I made a card this week. I know it's a pretty basic design but I did alot of colourising in Photoshop and with Copics. The whole digi stamp was in black and white but I changed the colour of the text and digitally painted the rose and butterflies. I then used the rose and big butterfly to create matching papers that I printed out as well. I then just edged the papers and stamp with Black Soot Distress Ink and did lots of matting and layers in black and royal blue card. I used a Copic marker to change the colour of the Card Candy and added to the corners. My final touch was a bit of a fail that looks a little better in person is I added Pinflair Glaze to the bubbles in the digi stamp. The glaze absorbed into the paper too much and stained but it is really glossy when you see it live. Ah well.
One thing I am loving and that's my Perfect Layers rulers to created nice even layers. I got the full sized ones so I could use them on bigger projects as well as cards. LOVE LOVE LOVE! Get yourself some if you are "straight line challenged" like me...lol. I can't cut a straight line to save my life, even with a paper trimmer...even with a guillotine! Someone at one time must have told me to "get bent" and boy I sure did...LOLOLOL.
SUPPLIES USED:
Bugaboo Stamps - Image name 4 square Beleive (link goes right to image I used)
Blue Cardstock - From stash
Black Cardstock - 12" x 12" from Papermill Direct
Backing papers - created by me in PS CS3 using the digistamp
Copic Ciao Markers - B29 Ultramarine, B24 Sky, YR23 Yellow Ochre & YR17 Golden Yellow
Craftworks Card Candi - in silver
Pinflair Craft Glaze
Distress Ink - Black Soot
CHALLENGES ENTERED:
Dream Valley Challenges - Anything Goes
Scribble and Scrap Challenge - Anything Goes
Through the Purple Haze - Anything Goes for a Male
Crafty Boots Challenge - Blue & White
Ooh La La Creations Challenge - Quotations
Just Inspirational Challenges - Anything Goes
Crafting for All Seasons - Things with Wings
14 May 2014
WOYWW 258
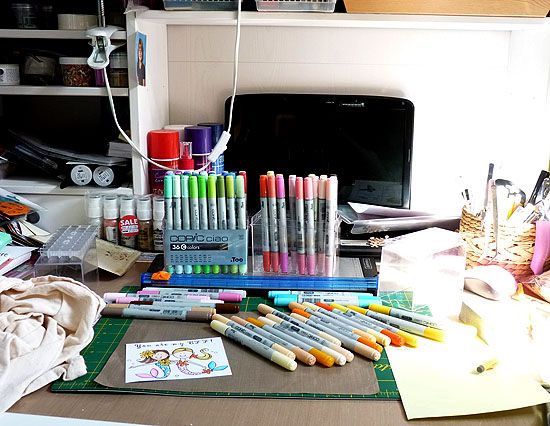
Hi peeps! t's been awhile since I posted on WOYWW. Well here is what my craft desk looks like this morning:
Funny thing though...this is what it's looked like for 2 days now. I was a happy little bunny colouring in a bunch of digi stamps whne my hubby so rudely interrupted me. He dragged me away from my craft room and that was 2 days ago and I've not been back since...even to tidy up! I go by the room every once in awhile to longingly look at my lovely Copics but am feeling a bit uninspired. Bleck!
On the positive side, it's a gorgeous sunny day here is Essex and I made it actually into the room itself to take this photo. I'm going in there in a few minutes to finish that digi stamp and finsh my DT projects...I mean it, I really am...lol. Go ahead and join us over at WOYWW and show us what's on your craft desk.
Funny thing though...this is what it's looked like for 2 days now. I was a happy little bunny colouring in a bunch of digi stamps whne my hubby so rudely interrupted me. He dragged me away from my craft room and that was 2 days ago and I've not been back since...even to tidy up! I go by the room every once in awhile to longingly look at my lovely Copics but am feeling a bit uninspired. Bleck!
On the positive side, it's a gorgeous sunny day here is Essex and I made it actually into the room itself to take this photo. I'm going in there in a few minutes to finish that digi stamp and finsh my DT projects...I mean it, I really am...lol. Go ahead and join us over at WOYWW and show us what's on your craft desk.
02 May 2014
DSC #86 - Anything with Wings
Welcome to this week's challenge over at Digitally Sweet Challenges where we LOVE all things DIGITAL and CRAFTY. This week's theme is "Anything with Wings" and our lovely sponsor is Lacy Sunshine!
I made another card this week using an adorable Lacy Sunshine digi stamp:
Below is a list of supplies I used. This is a super simple card to make but the colours just came together nicely. Wish my colouring job on the stamp looked better in the photo. The shading looks much better in person.
SUPPLIES USED:
Lacy Sunshine - digi stamp Chrys Cherished Wing (near bottom of page)
Papermill Direct - white cardstock base I cut the card size to 6.5" x 6.5"
Paper Cellar - background paper from their 6" x 6" paper pad called "Celebrations"
Spellbinder Dies - Labels 8
Copic Ciao Alcohol Markers
Distress Ink - Spun Sugar
From My Stash - Pink cardstock, silvery ribbon, corner gems, wing glitter and grey marker pen
CHALlENGES ENTERED:
Glitter n Sparkle Challenge - Add Ribbon
Scribble and Scrap Challenge - Anything Goes
That Craft Place Challenge - Anything Goes
Digi Chooseday Challenges - Wings and Things
Penny's Paper-Crafty Challenge - Pastel Colours
Movin Along with the Times - Pretty Pastels
Craft Ribbons Challenge - Anything Goes with Ribbon
I made another card this week using an adorable Lacy Sunshine digi stamp:
Below is a list of supplies I used. This is a super simple card to make but the colours just came together nicely. Wish my colouring job on the stamp looked better in the photo. The shading looks much better in person.
SUPPLIES USED:
Lacy Sunshine - digi stamp Chrys Cherished Wing (near bottom of page)
Papermill Direct - white cardstock base I cut the card size to 6.5" x 6.5"
Paper Cellar - background paper from their 6" x 6" paper pad called "Celebrations"
Spellbinder Dies - Labels 8
Copic Ciao Alcohol Markers
Distress Ink - Spun Sugar
From My Stash - Pink cardstock, silvery ribbon, corner gems, wing glitter and grey marker pen
CHALlENGES ENTERED:
Glitter n Sparkle Challenge - Add Ribbon
Scribble and Scrap Challenge - Anything Goes
That Craft Place Challenge - Anything Goes
Digi Chooseday Challenges - Wings and Things
Penny's Paper-Crafty Challenge - Pastel Colours
Movin Along with the Times - Pretty Pastels
Craft Ribbons Challenge - Anything Goes with Ribbon
25 April 2014
DSC #85 - Bingo Card
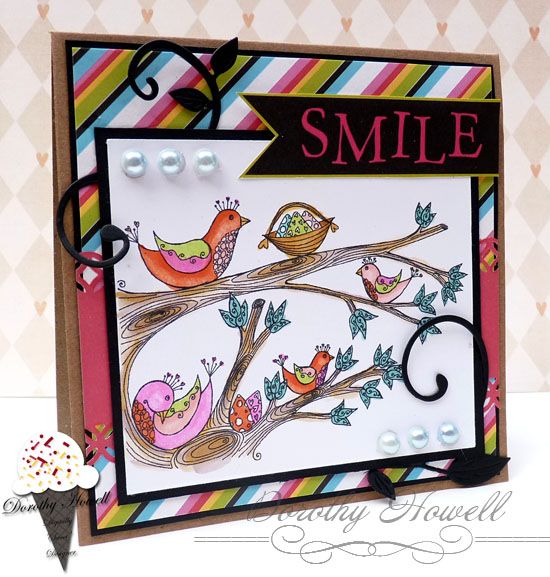
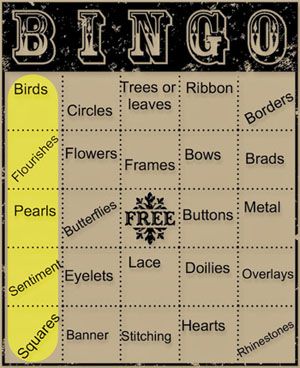
Welcome to this week's Design Team Project for Digitally Sweet Challenges! This week we were sponsored by Stitchy Bear Digi Stamp Outlet. We were given a wonderful choice of images to work with to go with a Bingo Card Challenge. Here is a card I made then the line of Bingo card I went with to make it:
This was a pretty basic card design but I just love those colours! Before I coloured the digi stamp, I picked out the paper I wanted to use. I chose a paper from a Colorbok 12" x 12" pad called "Fruit Punch" that I ordered a while back from Create and Craft TV. I knew the digi stamp had lots of detail so a simpler paper design was needed. This diagonal stripe screamed at me as did the plain pink to match. So I dived into my sets of Copic Ciao pens and picked matching colours to use on the stamp. The "SMILE" flag was from the Colorbok paper pad as well. The pad has a few sheets of sentiments, journal spots and alphabet to match. The flourish is a Cheery Lynn die called Fanciful Flourish Left that I cut pieces off of to arrange in the corners...all added to a craft card base.
SUPPLIES USED:
Stitchy Bear Digi Stamps - called "Birds and Babies" (link takes you to the stamp's page)
Papermania - 6" x 6" craft cards and envelopes
Cheery Lynn Designs - Fanciful Flouish Left die cut with my Cuttlebug (bought in the UK)
Colorbok Papers - Fruit Punch 12 " x 12" paper pad (diagonal stripe, pink paper & sentiment)
Papermill Direct - 300 gsm 12" x 12" black cardstock
Martha Stewart border punch (I don't know the name of it.)
Copic Ciao alcohol pens
Pearls from stash
CHALLENGES ENTERED:
Simply Less is More - Makes Me Smile
4 Crafty Girlz Challenge - Anything Goes
Scribble and Scrap Challenge - Anything Goes
The Squirrel & the Fox Challenge - Use a diecut or punch
Through the Purple Haze Challenge - Creativity Strikes
This was a pretty basic card design but I just love those colours! Before I coloured the digi stamp, I picked out the paper I wanted to use. I chose a paper from a Colorbok 12" x 12" pad called "Fruit Punch" that I ordered a while back from Create and Craft TV. I knew the digi stamp had lots of detail so a simpler paper design was needed. This diagonal stripe screamed at me as did the plain pink to match. So I dived into my sets of Copic Ciao pens and picked matching colours to use on the stamp. The "SMILE" flag was from the Colorbok paper pad as well. The pad has a few sheets of sentiments, journal spots and alphabet to match. The flourish is a Cheery Lynn die called Fanciful Flourish Left that I cut pieces off of to arrange in the corners...all added to a craft card base.
SUPPLIES USED:
Stitchy Bear Digi Stamps - called "Birds and Babies" (link takes you to the stamp's page)
Papermania - 6" x 6" craft cards and envelopes
Cheery Lynn Designs - Fanciful Flouish Left die cut with my Cuttlebug (bought in the UK)
Colorbok Papers - Fruit Punch 12 " x 12" paper pad (diagonal stripe, pink paper & sentiment)
Papermill Direct - 300 gsm 12" x 12" black cardstock
Martha Stewart border punch (I don't know the name of it.)
Copic Ciao alcohol pens
Pearls from stash
CHALLENGES ENTERED:
Simply Less is More - Makes Me Smile
4 Crafty Girlz Challenge - Anything Goes
Scribble and Scrap Challenge - Anything Goes
The Squirrel & the Fox Challenge - Use a diecut or punch
Through the Purple Haze Challenge - Creativity Strikes
18 April 2014
DSC # 84 - Digital Inspiration
As you've noticed, I've not been around for a couple weeks...not my fault...really it's not! LOL To be honest, I had to go into the hospital for a few day as I had a mini stroke. My left side went tingly and numb so I went to the emergency room. After a whole lotta tests, they confirmed a slight stroke.
No worries though. I am doing fine with very little lasting effects. I've not done much crafting since I've been home as I'm taking it easy. But I did get to sit at the computer and create my DT sample for this week's challenge over at Digitally Sweet Challeges. This week we worked with an image from our sponsor, Limited Runs Digi Stamps, and an inpirational image.
This week is a digital card front for Easter I created in Photoshop. The church digi stamp is from Limited Runs and the colours I used were from the inspirational image. I painted the church image and stained glass window in PS and added all kinds of textures. Thanks for having a look!
SUPPLIES USED:
Photoshop CS3
Limited Runs Digi Stamps - Church image
Stanied glass line art from web
Font - Effloresce
Other Elements creted by me in PS
No worries though. I am doing fine with very little lasting effects. I've not done much crafting since I've been home as I'm taking it easy. But I did get to sit at the computer and create my DT sample for this week's challenge over at Digitally Sweet Challeges. This week we worked with an image from our sponsor, Limited Runs Digi Stamps, and an inpirational image.
This week is a digital card front for Easter I created in Photoshop. The church digi stamp is from Limited Runs and the colours I used were from the inspirational image. I painted the church image and stained glass window in PS and added all kinds of textures. Thanks for having a look!
SUPPLIES USED:
Photoshop CS3
Limited Runs Digi Stamps - Church image
Stanied glass line art from web
Font - Effloresce
Other Elements creted by me in PS
26 May 2013
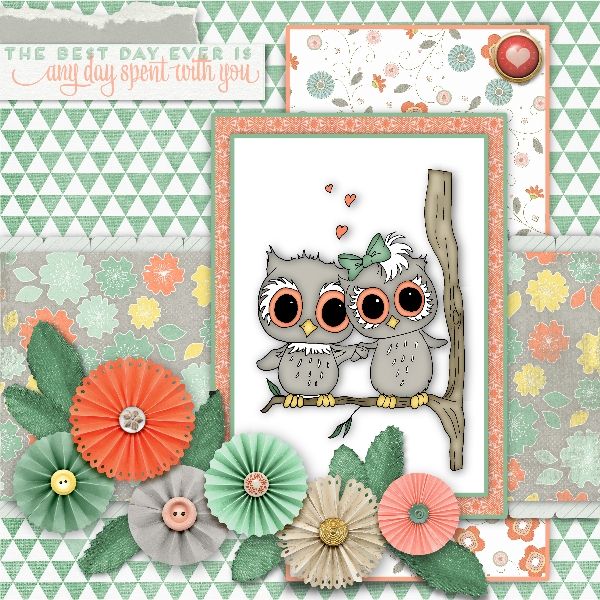
Owl Couple Digial Layout
Since I'm still waiting on my craft room to get painted, I've been doing some digital art in Craft Artist Pro. Just downloaded this new kit and knew it would make a cute card front.
I used one of the new digital stamps I won from Lacy Sunshine Stamps. Ain't they da cutest? lol
The digital scrap kit I used was a freebie I downloaded today over at Pixels and Company.
I colourised the digi stamp in Photoshop then assembled the page using Craft Artist Pro.
CHALLENGES:
Lacy Sunshine Challenge - Anything Goes
The Sketchy Challenges - Karen's sketch
Challenges 4 Everybody - #21 Anything Goes
Word Art Wednesday - #81 Anything Goes
My Heart Pieces Challenge - Be Sentimental
I used one of the new digital stamps I won from Lacy Sunshine Stamps. Ain't they da cutest? lol
The digital scrap kit I used was a freebie I downloaded today over at Pixels and Company.
I colourised the digi stamp in Photoshop then assembled the page using Craft Artist Pro.
CHALLENGES:
Lacy Sunshine Challenge - Anything Goes
The Sketchy Challenges - Karen's sketch
Challenges 4 Everybody - #21 Anything Goes
Word Art Wednesday - #81 Anything Goes
My Heart Pieces Challenge - Be Sentimental
Subscribe to:
Posts (Atom)