Happy Friday one and all! Here I am with my DT project for this week's challenge at Digitally Sweet Challenges. Our theme this week is FRIENDSHIP and our lovely sponsor is Sparkle & Sprinkle. For today's project I made a card of course...lol. This one was fun:
I enjoyed making this card because as soon as I saw this image, this card popped into my head. I wanted to use lots of bright colours so out came the Copic Ciao markers and away I went. The base is a scalloped edge white card, the flowers are old Prima Flowers I ordered off of QVC many moons ago. Final touch was adding the little shells. Hope you like it too!
SUPPLIES USED:
BFF Mermaid digital stamp - Sparkle & Sprinkle (link takes you right to the stamp's page)
Copic Ciao Markers
White Scalloped 6" x 6" blank card - From stash
Aqua cardstock & blue dotted cardstock - From stash
Prima Flowers - in tubes from stash
Green, Pink and Orange Trims - Bazzil Basic Cardstock Borders
Shells - From stash
Big flatback pearls, small pearls and Card Candi flower centres - From stash
31 May 2014
26 May 2014
DSC #89 Babies
Well it's official! My Scheduling function on Blogger is not working. I
had this post set for Friday morning, but just noticed that it hadn't
posted. My HUGE apologies to Digitally Sweet Challenge for my DT project
not to be there.
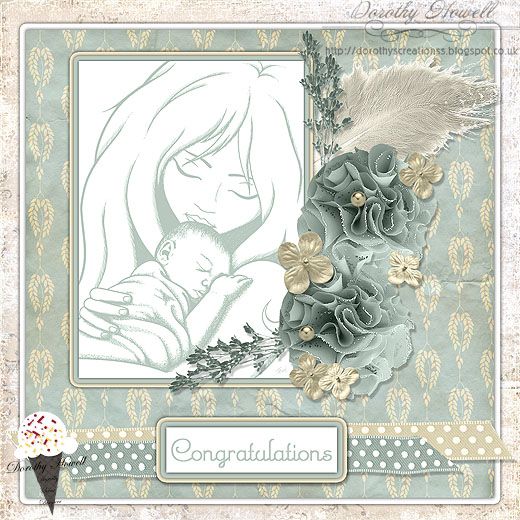
Welcome to another DT project for this week's challenge at Digitally Sweet challenges! We love digital over at Digitally Sweet so this week I created an all digi image using one of our sponsor's images from Stitchy Bear Stamps:
I created this image in Photoshop to use basically as a printable card topper. Our theme is "Babies" so I made it as a baby shower type card. I went through my Commercial Use digital scrapbooking folders and found elements to put with the Stitchy Bear stamp. The backing papers are from Far Far Hill.
22 May 2014
My First Swap
Happy Thursday All! I'd like to show you what I received. I recently joined my first Swap Group on Facebook and just completed my very first swap ever! The group is UK-Ireland Craft Swaps. Since I am just beginning to get into Altered Art and Crafting, I thought I would start simple by entering a Tag Swap. We were to stamp with Stazon black ink on 10 tags with 10 different stamps and swap with a partner.
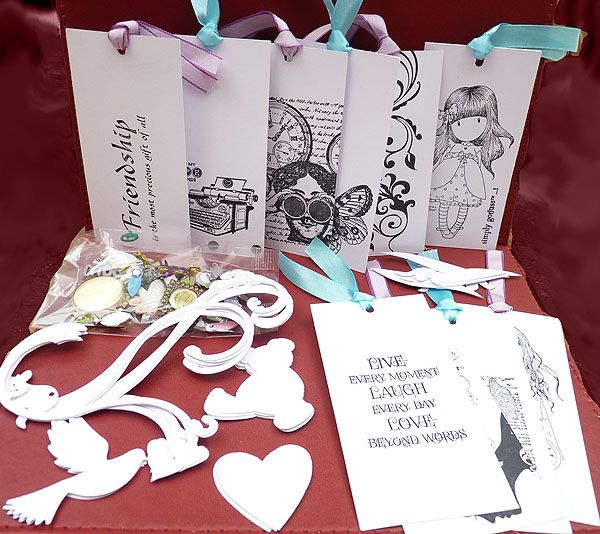
My lovely partner was Mandy and here is what she sent me:
She sent me some great stamped images that I know I can use in other projects. It's also customary to send other extra little goodies to add to our stashes. She sent me some really neat die cuts: a huge swirl, doves, teddy bears, hearts, little tulip blossoms and brackets. There were several of each, I didn't count them but I think there are 4 or 5 of each. The last item was a bag of sparkly goodness full of beads, flat backed gems, brads, resin pieces, bottle cap, etc.
I also sent her 10 tags with goodies but I didn't take a photo of them. I sent 5 white tags and 5 kraft card tags with seam binding ribbon that I colourised in 5 different colours. I did 2 in each colour as follows: 2 were spritzed with white pearl homemade glimmer mist, 2 spritzed with dark grey homemade glimmer mist, 2 spritzed with Mr Huey Tan Paint Mist, 2 coloured with Distress Ink in Dusty Rose and the last 2 I colored with Ranger Alcohol Ink in Cloudy Blue. The goodies I sent were a bunch of sheer ribbons in black, gray and white, a smal heart frame, 2 very large black roses from Mulberry Crafts, 4 Vintage images I printed out and coated in matt medium and 2 large panels of really interesting lace I recently bought. Mandy does lots of altered projects so I hope these will come in handy for her.
So I think my first swap was a success. I really enjoyed putting it all together. It was so much fun waiting for my parcel to arrive from Mandy and wondering if she would like what I sent her. I will participating in a few more swaps coming up so I'll be reporting how they go. If you like altered art and altered crafting and live in the UK or Ireland (or anywhere really as there are International swaps as well) then come join us over at UK-Ireland Craft Swaps...we would love to have you join in the fun!
Have a wonderful day and Happy Crafting!!!
16 May 2014
DSC # 88 Blue & Yellow
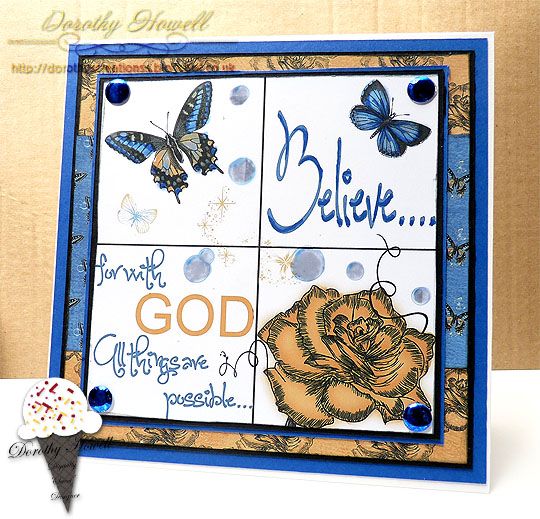
Happy Friday ya'll! That's my Southern coming out in me today...lol. So it's Friday and ya'll know what that means...it's time to show you my Design Team project for Digitally Sweet Challenges! This week's theme for you is Blue & Yellow and the sponsor is Bugaboo Stamps. We got to choose our own image and here's my project:
I made a card this week. I know it's a pretty basic design but I did alot of colourising in Photoshop and with Copics. The whole digi stamp was in black and white but I changed the colour of the text and digitally painted the rose and butterflies. I then used the rose and big butterfly to create matching papers that I printed out as well. I then just edged the papers and stamp with Black Soot Distress Ink and did lots of matting and layers in black and royal blue card. I used a Copic marker to change the colour of the Card Candy and added to the corners. My final touch was a bit of a fail that looks a little better in person is I added Pinflair Glaze to the bubbles in the digi stamp. The glaze absorbed into the paper too much and stained but it is really glossy when you see it live. Ah well.
One thing I am loving and that's my Perfect Layers rulers to created nice even layers. I got the full sized ones so I could use them on bigger projects as well as cards. LOVE LOVE LOVE! Get yourself some if you are "straight line challenged" like me...lol. I can't cut a straight line to save my life, even with a paper trimmer...even with a guillotine! Someone at one time must have told me to "get bent" and boy I sure did...LOLOLOL.
SUPPLIES USED:
Bugaboo Stamps - Image name 4 square Beleive (link goes right to image I used)
Blue Cardstock - From stash
Black Cardstock - 12" x 12" from Papermill Direct
Backing papers - created by me in PS CS3 using the digistamp
Copic Ciao Markers - B29 Ultramarine, B24 Sky, YR23 Yellow Ochre & YR17 Golden Yellow
Craftworks Card Candi - in silver
Pinflair Craft Glaze
Distress Ink - Black Soot
CHALLENGES ENTERED:
Dream Valley Challenges - Anything Goes
Scribble and Scrap Challenge - Anything Goes
Through the Purple Haze - Anything Goes for a Male
Crafty Boots Challenge - Blue & White
Ooh La La Creations Challenge - Quotations
Just Inspirational Challenges - Anything Goes
Crafting for All Seasons - Things with Wings
14 May 2014
WOYWW 258
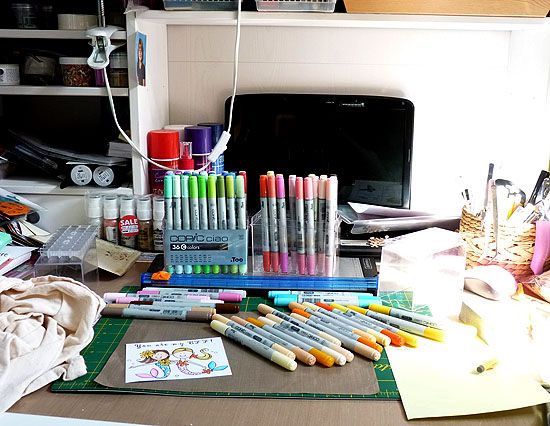
Hi peeps! t's been awhile since I posted on WOYWW. Well here is what my craft desk looks like this morning:
Funny thing though...this is what it's looked like for 2 days now. I was a happy little bunny colouring in a bunch of digi stamps whne my hubby so rudely interrupted me. He dragged me away from my craft room and that was 2 days ago and I've not been back since...even to tidy up! I go by the room every once in awhile to longingly look at my lovely Copics but am feeling a bit uninspired. Bleck!
On the positive side, it's a gorgeous sunny day here is Essex and I made it actually into the room itself to take this photo. I'm going in there in a few minutes to finish that digi stamp and finsh my DT projects...I mean it, I really am...lol. Go ahead and join us over at WOYWW and show us what's on your craft desk.
09 May 2014
DSC #87 - Mother's Day
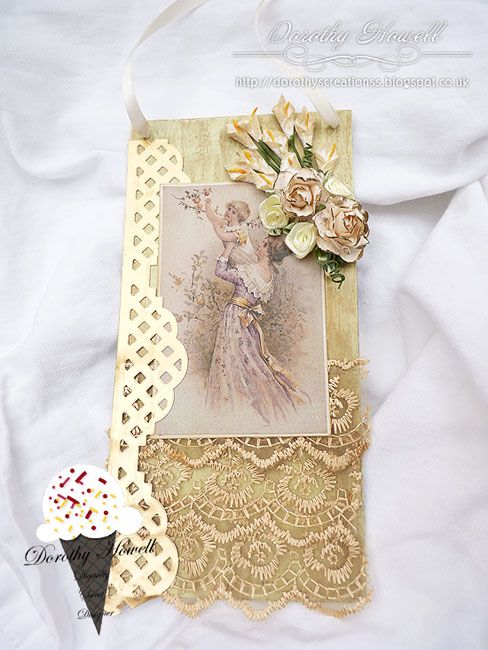
Happy Friday all! It's time for this week's challenge at Digitally Sweet challenges! This week our theme was Mother's Day since it's this Sunday in the US. Our lovely sponsor is Lunagirl and we were given a bunch of images to choose from.
I chose to use one image on a little hanging plaque that would make a quick, inexpensive gift for Mum.
Supplies List:
White coated Chipboard base - from stash
Pale green paint - I mixed 2 Dulux paint tester pots to get a yellowy green
Gold Paint - DecoArt Dazzling Mettalic Elegant Finsh in Glorious Gold
Flowers (Lillies, large roses) - Mulberry Crafts
Little Silk Rosettes - from stash
Gold Lace - from a kit bought from Fiona aka Jennings644
Matt Gold Mirror Cardstock - from stash
Spellbinder Dies - Lattic Accents
Galleria Matt Medium
Distress Ink in Antique Linen
I painted the white side of the chipboard in the yellow-green paint and dried with heat gun. I then took some metallic gold paint and smudged it in one direction with my finger. This gave the background an antiqued look. I coated the printed Lunagirl image with matt medium to protect the inkjet print surface. I added the lace, lattice side boder and flowers. I used my Crop a Dile Big Bite to punch 2 holes in the corners and added a cream ribbon for hanging.
It was a quick project that would make a great Mother's Day gift that doesn't cost a lot of money.
I chose to use one image on a little hanging plaque that would make a quick, inexpensive gift for Mum.
White coated Chipboard base - from stash
Pale green paint - I mixed 2 Dulux paint tester pots to get a yellowy green
Gold Paint - DecoArt Dazzling Mettalic Elegant Finsh in Glorious Gold
Flowers (Lillies, large roses) - Mulberry Crafts
Little Silk Rosettes - from stash
Gold Lace - from a kit bought from Fiona aka Jennings644
Matt Gold Mirror Cardstock - from stash
Spellbinder Dies - Lattic Accents
Galleria Matt Medium
Distress Ink in Antique Linen
I painted the white side of the chipboard in the yellow-green paint and dried with heat gun. I then took some metallic gold paint and smudged it in one direction with my finger. This gave the background an antiqued look. I coated the printed Lunagirl image with matt medium to protect the inkjet print surface. I added the lace, lattice side boder and flowers. I used my Crop a Dile Big Bite to punch 2 holes in the corners and added a cream ribbon for hanging.
It was a quick project that would make a great Mother's Day gift that doesn't cost a lot of money.
02 May 2014
DSC #86 - Anything with Wings
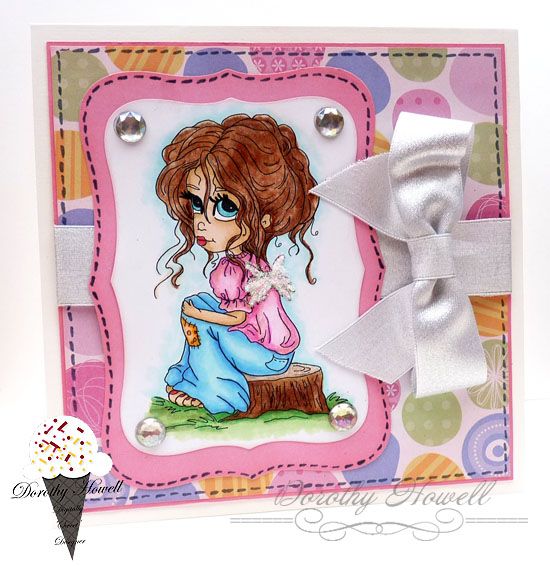
Welcome to this week's challenge over at Digitally Sweet Challenges where we LOVE all things DIGITAL and CRAFTY. This week's theme is "Anything with Wings" and our lovely sponsor is Lacy Sunshine!
I made another card this week using an adorable Lacy Sunshine digi stamp:
Below is a list of supplies I used. This is a super simple card to make but the colours just came together nicely. Wish my colouring job on the stamp looked better in the photo. The shading looks much better in person.
SUPPLIES USED:
Lacy Sunshine - digi stamp Chrys Cherished Wing (near bottom of page)
Papermill Direct - white cardstock base I cut the card size to 6.5" x 6.5"
Paper Cellar - background paper from their 6" x 6" paper pad called "Celebrations"
Spellbinder Dies - Labels 8
Copic Ciao Alcohol Markers
Distress Ink - Spun Sugar
From My Stash - Pink cardstock, silvery ribbon, corner gems, wing glitter and grey marker pen
CHALlENGES ENTERED:
Glitter n Sparkle Challenge - Add Ribbon
Scribble and Scrap Challenge - Anything Goes
That Craft Place Challenge - Anything Goes
Digi Chooseday Challenges - Wings and Things
Penny's Paper-Crafty Challenge - Pastel Colours
Movin Along with the Times - Pretty Pastels
Craft Ribbons Challenge - Anything Goes with Ribbon
Subscribe to:
Comments (Atom)


